

 Dispatch
 Cloud
Cloud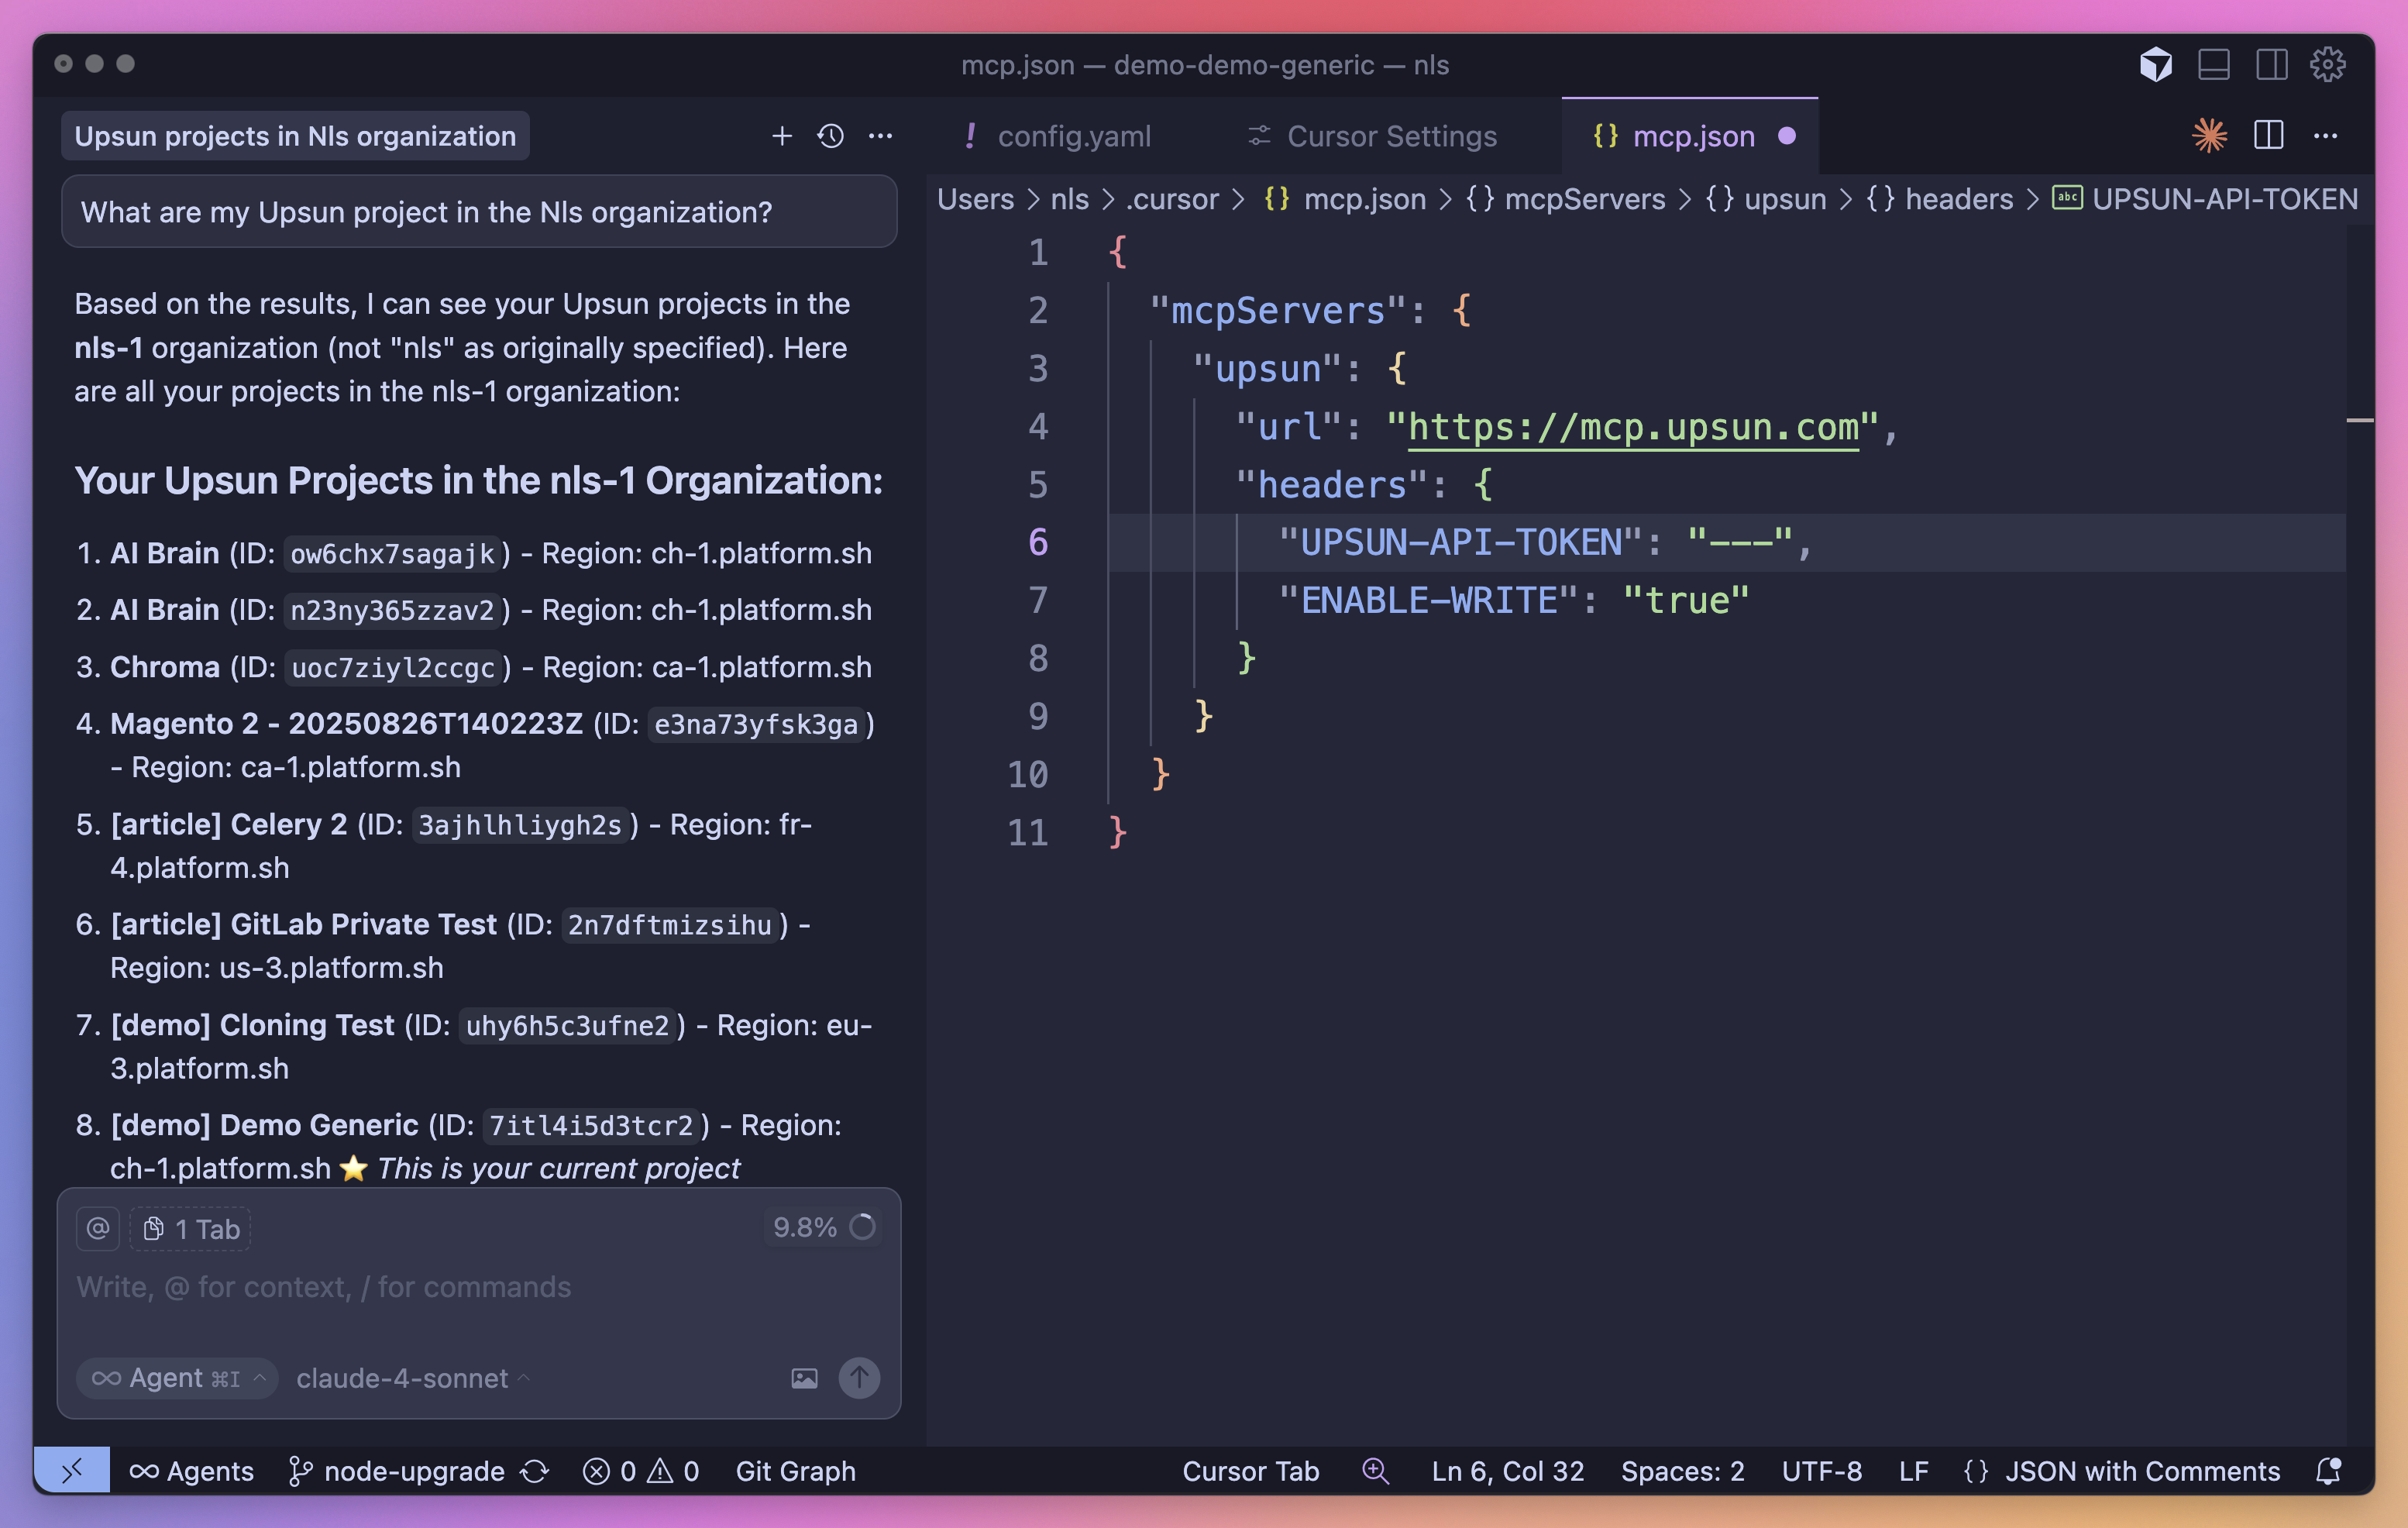
Key capabilities
Security Model
All MCP operations follow the existing Upsun Cloud security model. The MCP Server defaults to read-only operations for safety, with write operations available through explicit configuration. To enable write operations, include the following header in your MCP configuration:Architecture
The Upsun Cloud MCP Server uses Streamable HTTP transport for communication and event streaming. It uses HTTP POST for client-to-server messages with optional Server-Sent Events for streaming capabilities. This transport enables remote server communication and supports standard HTTP authentication methods including bearer tokens, API keys, and custom headers.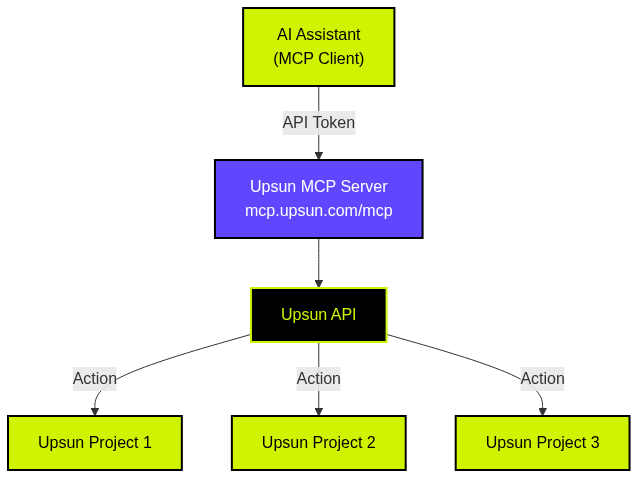
Installation
1. Generate an API Token
- In the Upsun Cloud Console, open your account settings.
- Generate a new API token with permissions appropriate for your projects.
2. Configure the MCP Client
- Configure your MCP client to connect to
mcp.upsun.com/mcp.
3. Connect and Use
- Connect your AI assistant or any MCP-compatible client.
- Begin managing Upsun Cloud resources using natural language commands.
Select your preferred client
The Upsun Cloud MCP server works with all major AI development environments.Choose your preferred client from the list below:Install in Cursor
Install in Cursor
Go to:
Settings -> Cursor Settings -> MCP -> Add new global MCP serverCopying the following configuration into your Cursor ~/.cursor/mcp.json file is the recommended approach. You may also install in a specific project by creating .cursor/mcp.json in your project folder.See the Cursor MCP docs for more info.Cursor Remote Server Connection
Install in Claude Code
Install in Claude Code
Install in Windsurf
Install in Windsurf
Add this to your Windsurf MCP config file. See Windsurf MCP docs for more info.
Windsurf Remote Server Connection
Install in VS Code
Install in VS Code
Add this to your VS Code MCP config file. See VS Code MCP docs for more info.
VS Code Remote Server Connection
Install in Cline
Install in Cline
You can easily configure the Upsun MCP server through Cline:
- Open Cline.
- Click the hamburger menu icon (☰) to enter the MCP Servers section.
- On the Remote Servers tab, click Edit Configuration.
- Add upsun to
mcpServers:
Install in Zed
Install in Zed
Add this to your Zed
settings.json. See Zed Context Server docs for more info.Install in Augment Code
Install in Augment Code
To configure the Upsun MCP server in Augment Code:Manual ConfigurationOnce the MCP server is added, restart your editor. If you receive any errors, check the syntax to make sure closing brackets or commas are not missing.
- Press Cmd/Ctrl+Shift+P or go to the hamburger menu in the Augment panel.
- Select Edit Settings
- Under Advanced, click Edit in settings.json
- Add the server configuration to the
mcpServersarray in theaugment.advancedobject
Install in Roo Code
Install in Roo Code
Add this to your Roo Code MCP configuration file. See Roo Code MCP docs for more info.
Roo Code Remote Server Connection
Install in Gemini CLI
Install in Gemini CLI
See Gemini CLI Configuration for details.If the
- Open the Gemini CLI settings file. The location is
~/.gemini/settings.json(where~is your home directory). - Add the following to the
mcpServersobject in yoursettings.jsonfile:
mcpServers object does not exist, create it.Install in Claude Desktop
Install in Claude Desktop
Remote Server Connection
Open Claude Desktop and navigate to Settings > Connectors > Add Custom Connector. Enter the name asUpsun and the remote MCP server URL as https://mcp.upsun.com/mcp.Add your API token in the headers configuration:Install in Opencode
Install in Opencode
Add this to your Opencode configuration file. See Opencode MCP docs for more info.
Opencode Remote Server Connection
Install in JetBrains AI Assistant
Install in JetBrains AI Assistant
See JetBrains AI Assistant Documentation for more details.
- In JetBrains IDEs, go to
Settings->Tools->AI Assistant->Model Context Protocol (MCP) - Click
+ Add. - Click
Commandin the top-left corner of the dialog and select As JSON from the list. - Add this configuration and click
OK
- Click
Applyto save changes. - Repeat these steps to add
upsunfor JetBrains Junie: Go toSettings->Tools->Junie->MCP Settings.
Install in Kiro
Install in Kiro
See Kiro Model Context Protocol Documentation for details.
- Navigate
Kiro>MCP Servers - Add a new MCP server by clicking the
+ Addbutton. - Paste the configuration given below:
- Click
Saveto apply the changes.
Install in Trae
Install in Trae
Use the Add manually feature and populate the JSON configuration information for that MCP server.
For more details, visit the Trae documentation.
Trae Remote Server Connection
Install in Amazon Q Developer CLI
Install in Amazon Q Developer CLI
Add this to your Amazon Q Developer CLI configuration file. See Amazon Q Developer CLI docs for more details.
Install in Warp
Install in Warp
See Warp Model Context Protocol Documentation for details.
- Navigate
Settings>AI>Manage MCP servers. - Add a new MCP server by clicking the
+ Addbutton. - Paste the configuration given below:
- Click
Saveto apply the changes.
Install in Copilot Coding Agent
Install in Copilot Coding Agent
Using Upsun MCP with Copilot Coding AgentAdd the following configuration to the For more information, see the official GitHub documentation.
mcp section of your Copilot Coding Agent configuration file Repository->Settings->Copilot->Coding agent->MCP configuration:Install in LM Studio
Install in LM Studio
See LM Studio MCP Support for more information.
Manual set-up:
- Navigate to
Program(right side) >Install>Edit mcp.json. - Paste the configuration given below:
- Click
Saveto apply the changes. - Toggle the MCP server on/off from the right hand side, under
Program, or by clicking the plug icon at the bottom of the chat box.
Install in Visual Studio 2022
Install in Visual Studio 2022
You can configure the Upsun MCP server in Visual Studio 2022 by following the Visual Studio MCP Servers documentation.Add this to your Visual Studio MCP config file (see the Visual Studio docs for details):For more information and troubleshooting, refer to the Visual Studio MCP Servers documentation.
Install in Crush
Install in Crush
Add this to your Crush configuration file. See Crush MCP docs for more info.
Crush Remote Server Connection (HTTP)
Install in BoltAI
Install in BoltAI
Open the “Settings” page of the app, navigate to “Plugins,” and configure the Upsun MCP server:More information is available on BoltAI’s Documentation site. For BoltAI on iOS, see this guide.
Install in Rovo Dev CLI
Install in Rovo Dev CLI
Edit your Rovo Dev CLI MCP config by running the following command:Example config -
Remote Server Connection
Install in Zencoder
Install in Zencoder
To configure the Upsun MCP server in Zencoder, follow these steps:Once the MCP server is added, you can easily continue using it.
- Go to the Zencoder menu (…)
- From the dropdown menu, select Agent tools
- Click on the Add custom MCP
- Add the name and server configuration from below, and make sure to hit the Install button
Install in Qodo Gen
Install in Qodo Gen
See Qodo Gen docs for more details.
- Open Qodo Gen chat panel in VSCode or IntelliJ.
- Click Connect more tools.
- Click + Add new MCP.
- Add the following configuration:
Qodo Gen Remote Server Connection
Install in Perplexity Desktop
Install in Perplexity Desktop
See Local and Remote MCPs for Perplexity for more information.
- Navigate to
Perplexity>Settings. - Select
Connectors. - Click
Add Connector. - Select
Advanced. - Enter Server Name:
Upsun - Paste the following JSON in the text area:
- Click
Save.
Related content
Upsun Cloud AI tutorials
- Upsun Cloud AI and Machine Learning tutorials
- Experiment with Chainlit AI interface with RAG on Upsun Cloud
- Access Upsun Documentation contextually via Context7 + MCP
- Use the Upsun Cloud API to automate Agent deployment
- Upsun Cloud MCP Server Announcement
Upsun AI documentation
- Host AI Agents on Upsun Cloud
- Deploy AI on Upsun Cloud
- Upsun Cloud performance agent, which reads your observability data and returns a report of bottlenecks with recommended code changes