Beginner’s guide to Platform.sh: a complete end-to-end cloud Platform-as-a-Service for development teams. Discover the features and developer experience.
This post was originally published on the Platform.sh blog and reflects information from the time of publication.
Hey friends, I recently joined Platform.sh as a Developer Relations Engineer, and I’ve been playing with the platform for a few weeks now. In this blog post, I’ll share some things I’ve learned about Platform.sh, how I was able to deploy my first Node.js application, and a few features that I think could be improved.
Platform.sh is a complete end-to-end cloud Platform-as-a-Service (PaaS) solution for development teams. It lets you build, deploy, and host whatever kind of web application website you’re building on a single platform.Platform.sh handles all the infrastructure needs of a development team, allowing developers to spend more of their time building the application.
Platform.sh was built to tackle the problems development teams face in managing and scaling their apps and sites. These problems can range from figuring out the right infrastructure in which to build them on to managing a larger fleet of sites more effectively.Platform.sh solves these problems by providing a single platform for teams to perform all their infrastructure-related tasks simply and seamlessly.I like to think of Platform.sh as a Swiss Army Knife.Like a Swiss Army Knife, Platform.sh provides all the tools you need in one convenient package. When you use Platform.sh, you’ll see why Platform.sh is called the “the alternative to Kubernetes.”
CI/CD is a DevOps practice that everybody seems to be doing (because it’s actually a good practice). CI/CD reduces technical debts, incidents, and overall disaster in your code or applications by keeping your codebase up-to-date and by helping your application processes run smoothly. Platform.sh was built entirely around this practice, providing two deployment phases: Build and Deploy. In both phases, developers have the power to define what happens at every point in the deployment phases.
Platform.sh is the first-class PaaS for polyglot developers, It offers a wide range of language and database support. So whether you have a Drupal site or a NodeJS app, there’s support for it. For a comprehensive list of what languages and databases are supported, visit our Marketplace page.
When deploying sites for thousands of users around the world, global organizations are faced with the challenge of deploying to regions that are close to their users while still complying with local data protection laws. Platform.sh offers you the choice of multiple data regions so you can provide your customers the best in privacy and security. Platform.sh currently has data regions in North America, APAC, and Europe.
One thing I like about Platform.sh is that the product is focused on security. It lets you deliver your applications while keeping your site safe, secure, and available 24x7 with the use of cryptography, permissions, and access management. You’ll be informed immediately if a data breach is detected, and you can maintain full control of your data. In terms of compliance, Platform.sh adheres to the European GDPR (DPA available), German BDSG (DPA available), Canadian PIPEDA, and the Australian Privacy Act.
Developer experience is a key part of any developer-centred product. The quality of developer experience of a product is highly responsible for whether a product ends up winning the loyalty of developers.After using Platform.sh to deploy an application for the first time, I’ve noticed a few things that demonstrate how Platform.sh always keeps the developer experience in mind.
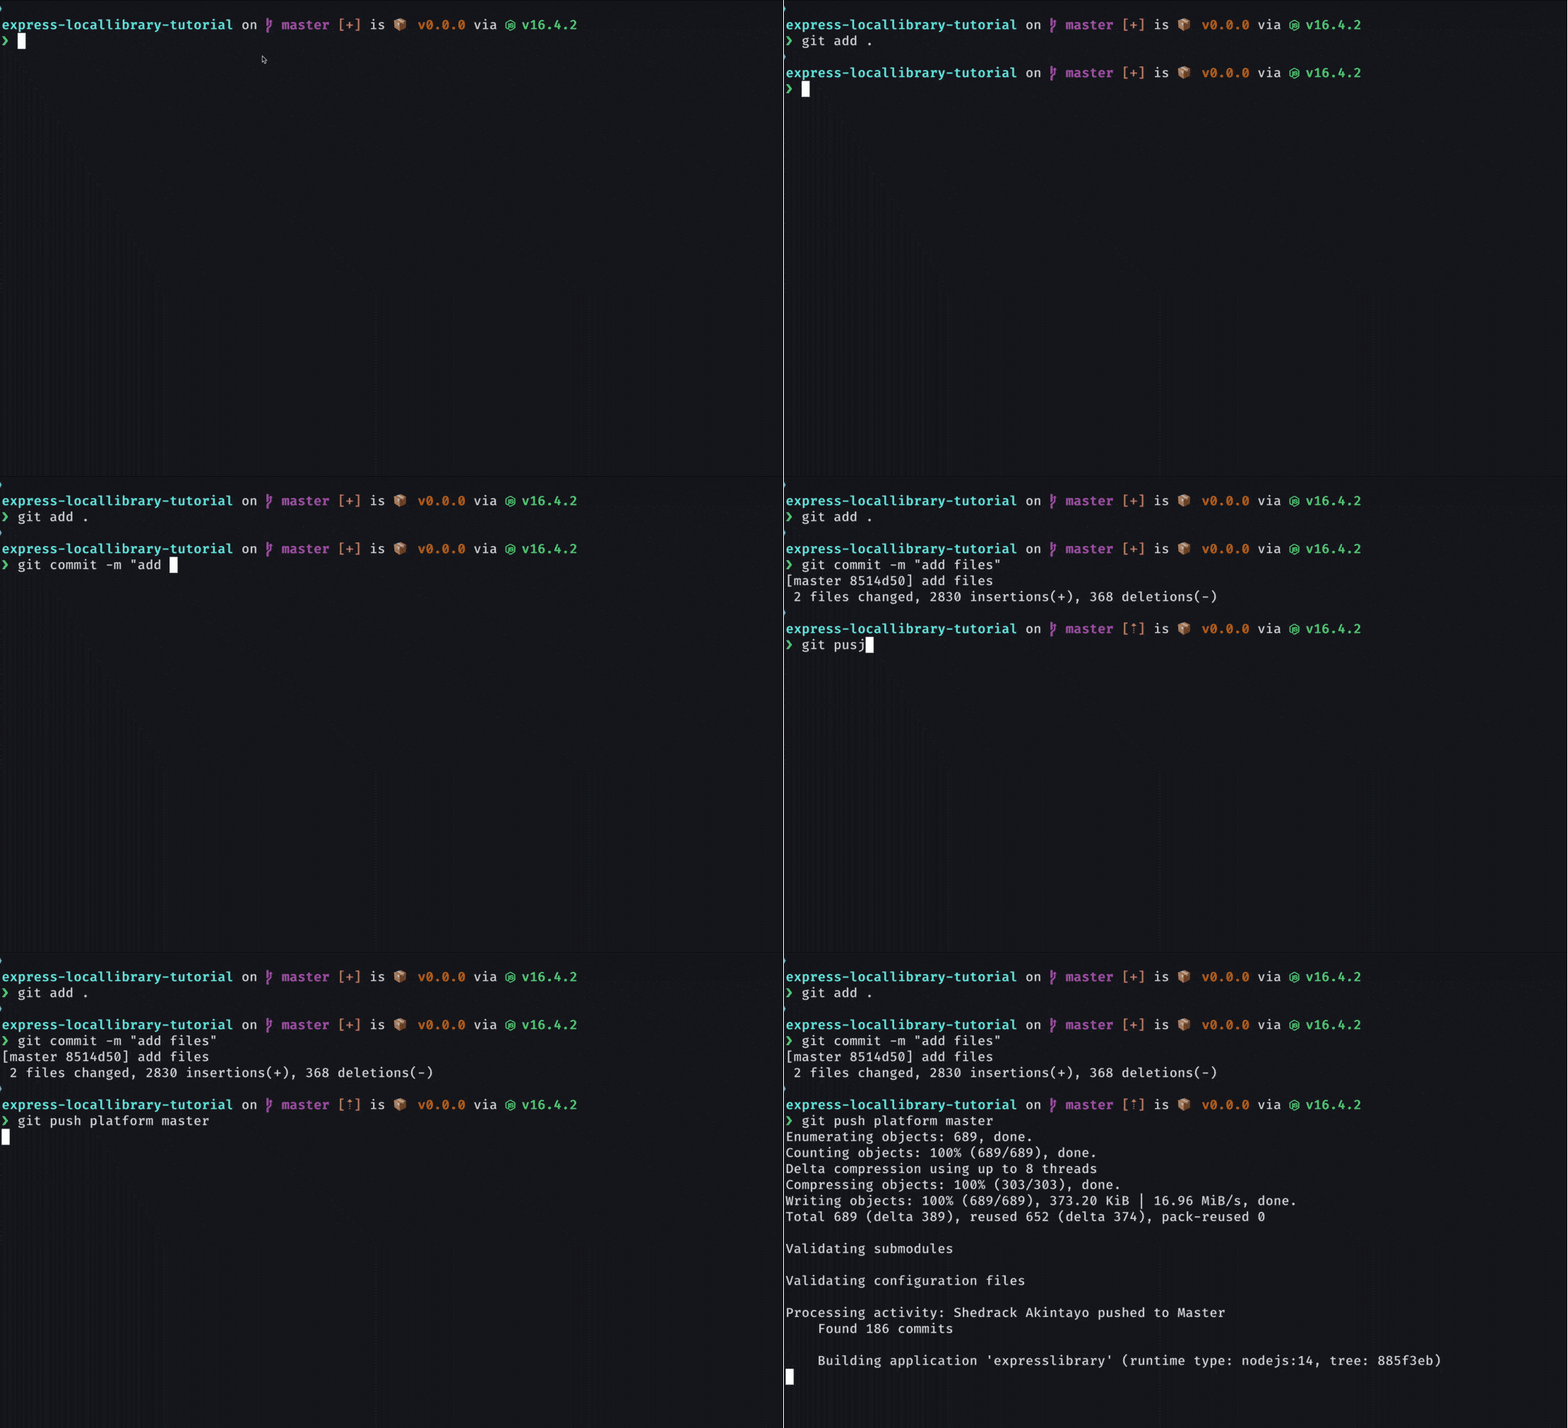
Platform.sh uses a Git-based architecture for managing changes and deployment. This is very useful because you don’t need to learn a new set of commands to deploy your application. Just set your project remote, add, commit, and push your application like you’d do for Github, Bitbucket, or Gitlab.
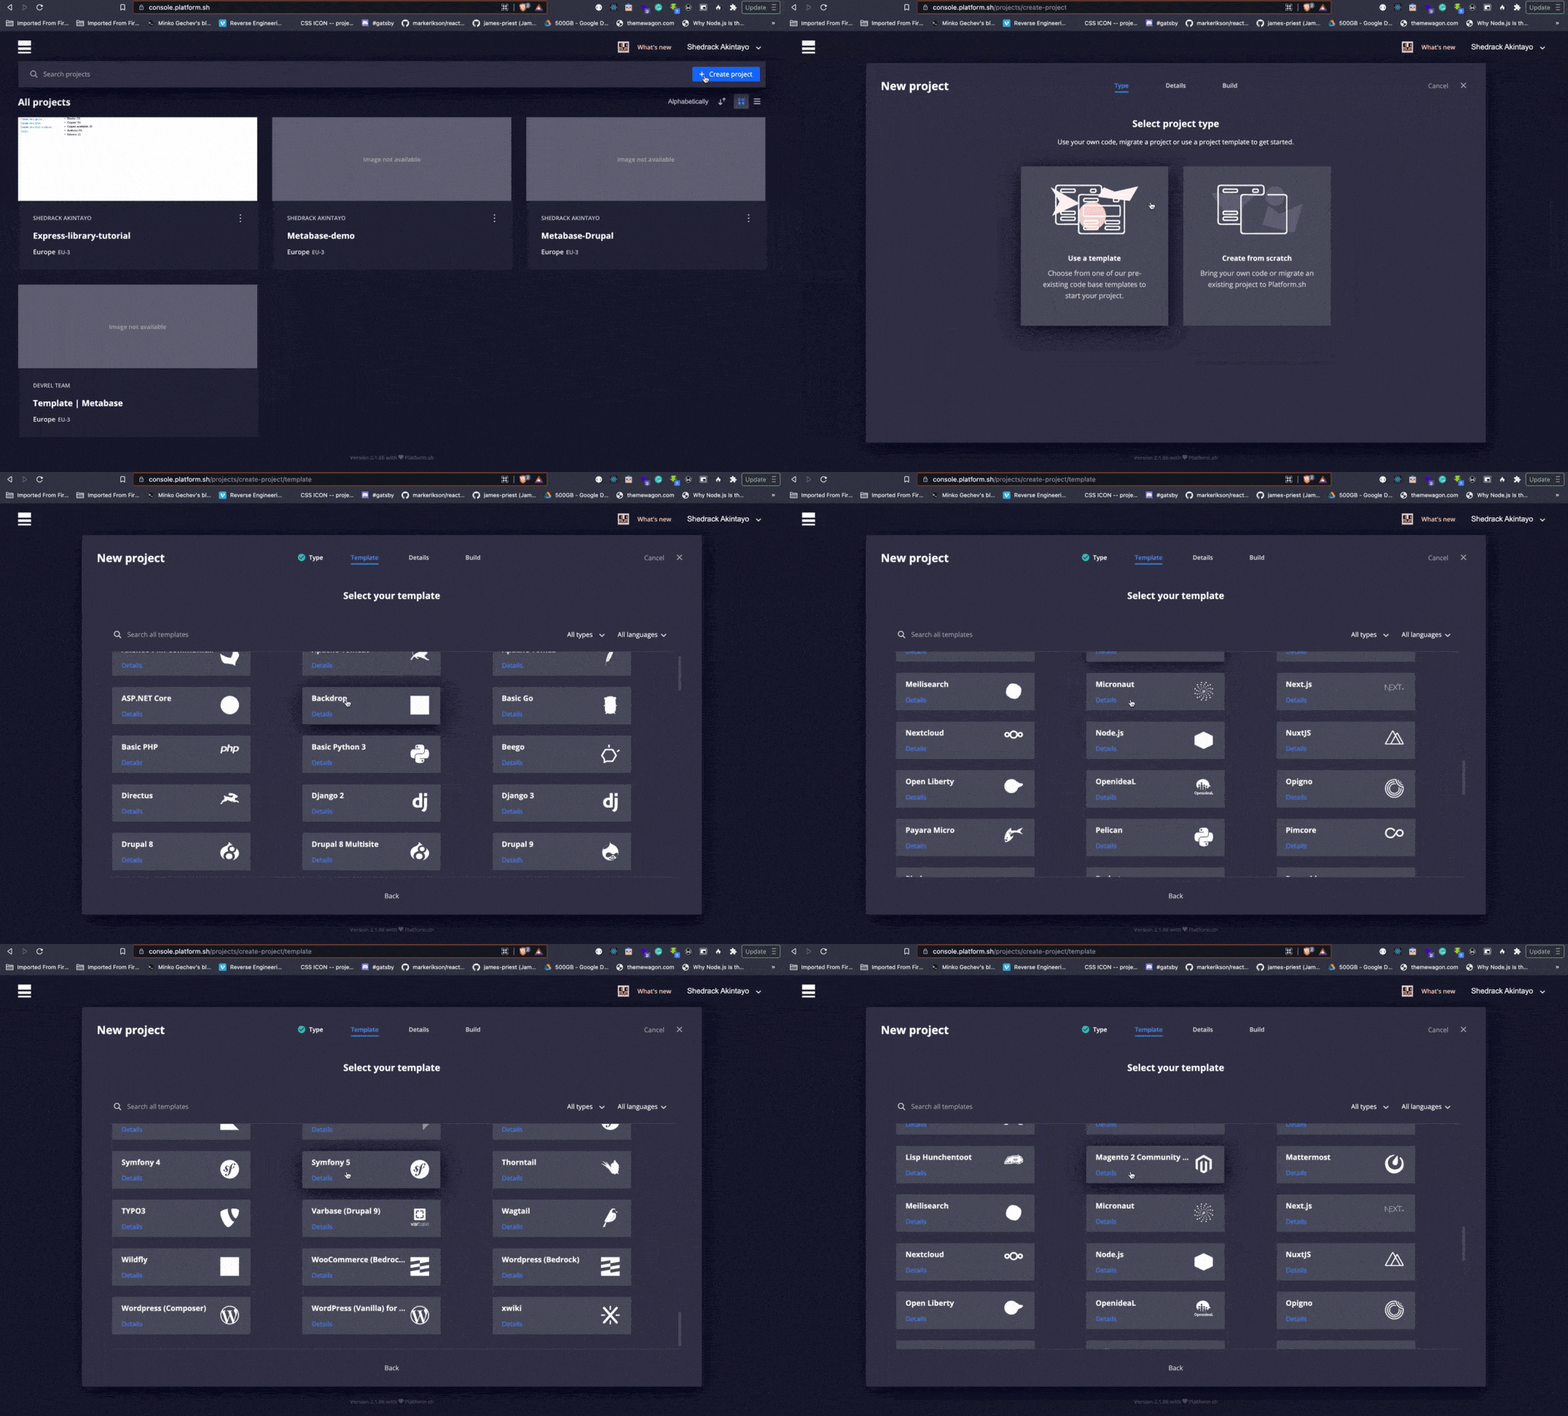
Platform.sh provides developers with a wide range of templates to kickstart their projects. These templates are already configured with everything needed to get your application from your local machine to the cloud. With these templates, developers don’t need to configure anything themselves from scratch. They can focus on just building their application instead of configuring their infrastructure.When you create a new project on the Platform.sh console, a modal with Use a template or Create from scratch is displayed on your browser window. If you just want to see your application live without worrying about configuration, using a template will solve this issue for you.Templates also help newbies understand how to configure a project on Platform.sh. For example, the Node.js template gave me a better understanding of how to deploy a Node.js application. I didn’t use the template, but looking at the way it was structured was enough for me to get my Node.js app running on Platform.sh.A few things, such as the README, can be improved in the template. That will be one of the items on my task list as I work to provide a better developer experience for everyone.
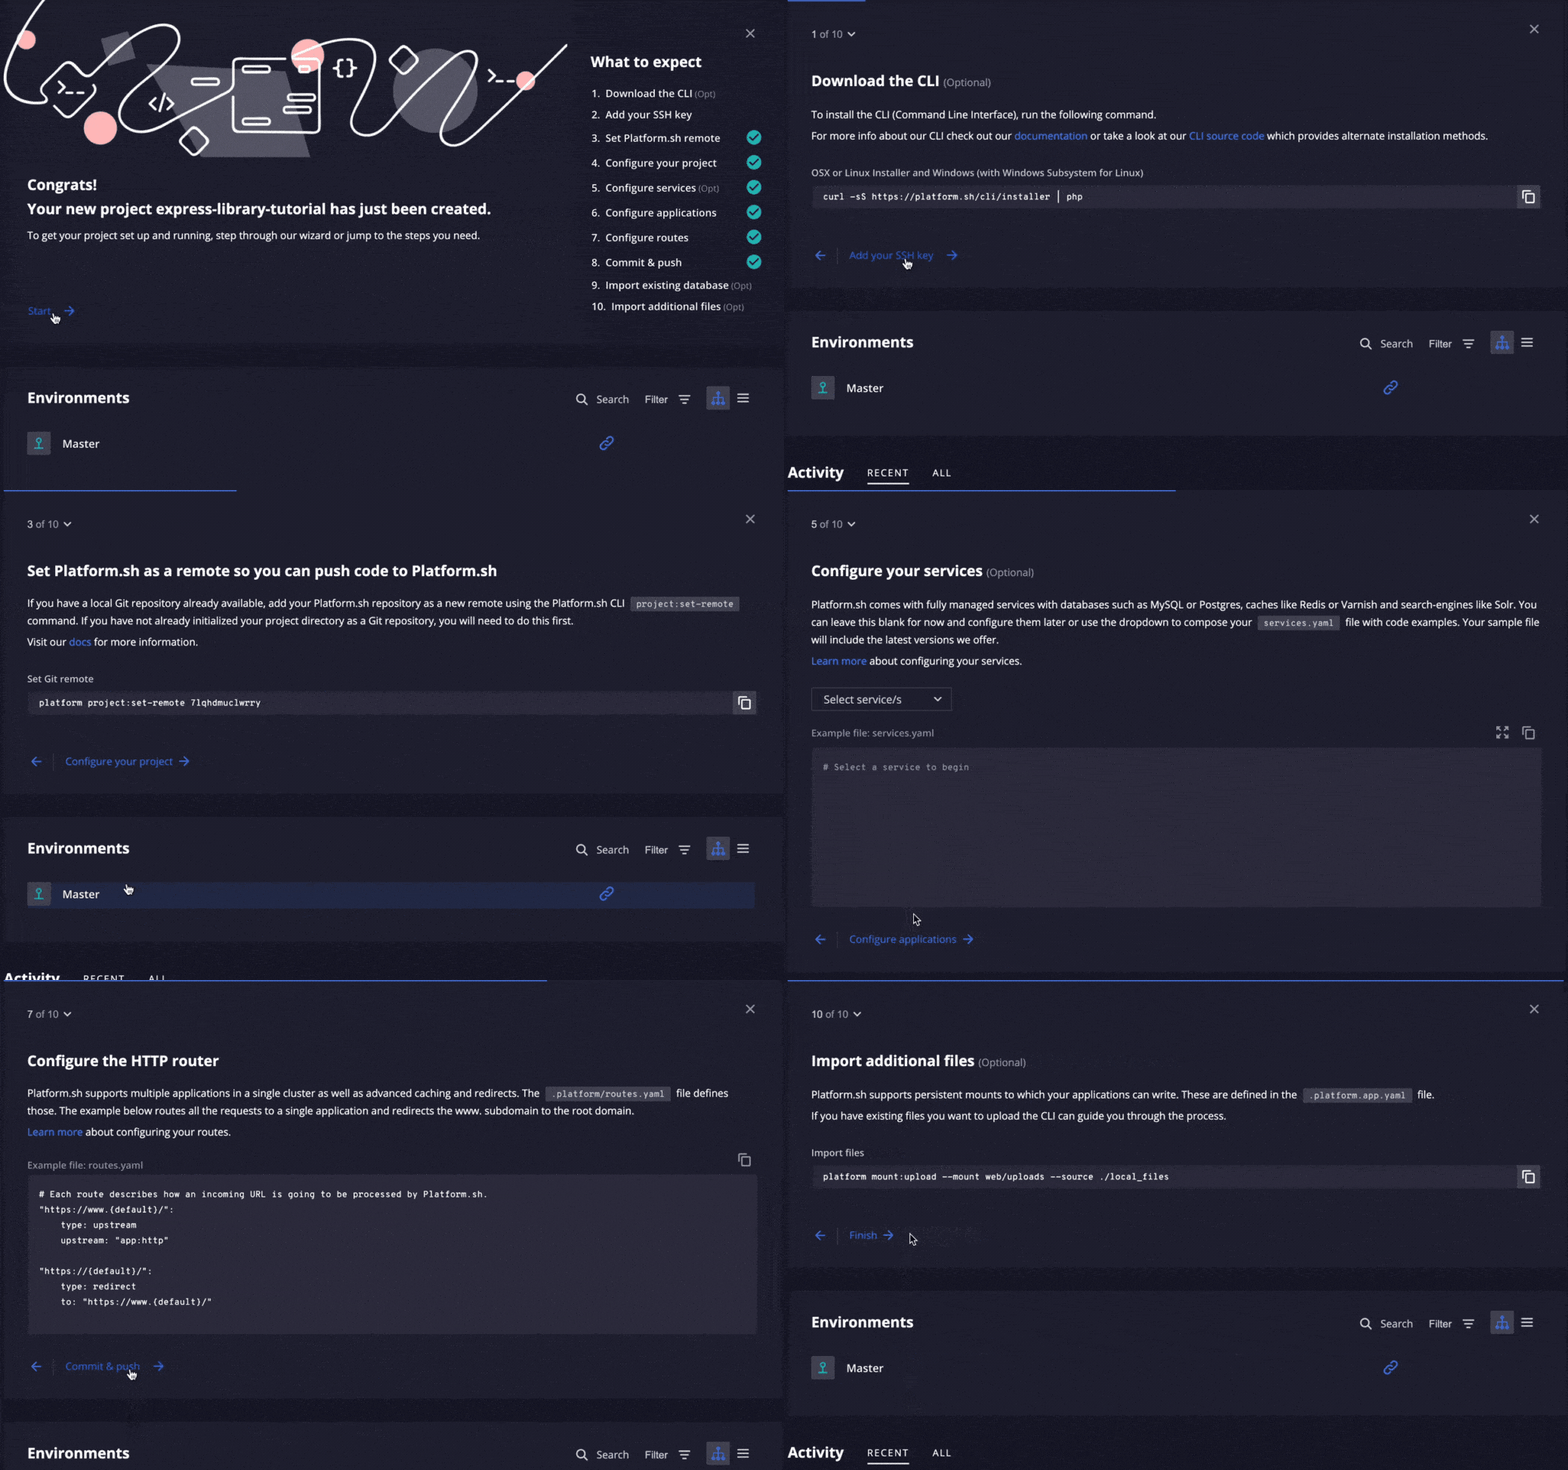
Another part of the Platform.sh management console that is well thought out is the setup wizard. The setup wizard is an onboarding guide that provides an interactive checklist of steps for deploying your application to Platform.sh. This is useful for beginners and for people who don’t want to wade into the documentation.
The CLI is the official tool for managing your Platform.sh projects directly from your terminal. Anything you can do within the management console can be done with the CLI.The CLI caters to developers who don’t want to leave their terminal to perform tasks on Platform.sh. It contains a list of commands that you can use to deploy and manage your applications. To use it, all you need to do is install the CLI and authenticate with your Platform.sh account in your browser.
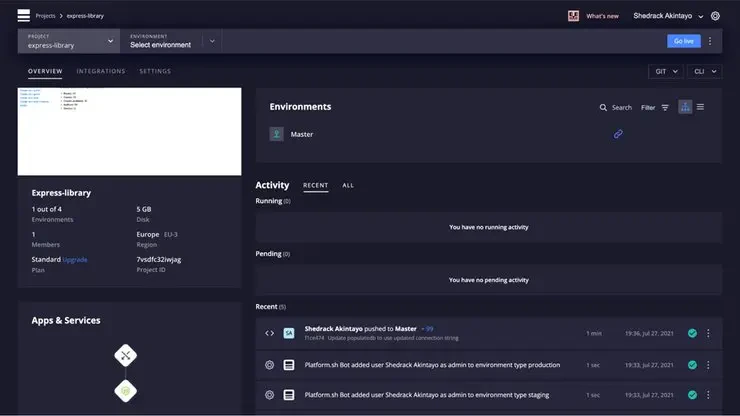
The management console lets you scale, run, and deploy your applications right from the browser. It has support for displaying multiple environments; you can monitor application deployment logs, delete projects, create integrations, add custom certificates, etc. The Git-based infrastructure is also built-in, so you can see your commits and all the pushes you’ve made.We’ll get to see these features in action when I try to deploy an application in the next section.
I created a Node.js application for a deployment demo on Cloud Foundry. The application displays a virtual library where a user can add, delete, and update books. The user can also create a new genre for books or update one. Now let’s use the application to test the deployment experience on Platform.sh.
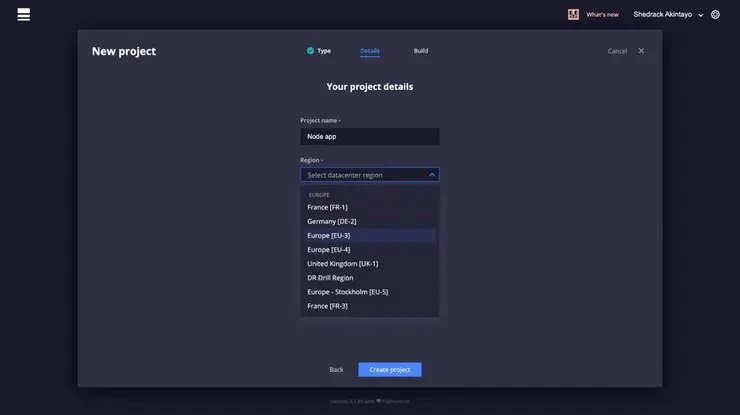
After installing the Platform.sh CLI and creating an account, our next step is to create a new project by selecting the Create project button on the top right section of the page.After clicking on the button, we’ll see a modal displaying two options: Use a template and Create from scratch. We’ll select Create from scratch so we can do all the necessary configurations manually without using a template.After making our choice, we’re prompted to put in our project name and a region. For the region, we’ll use Europe (EU-4) since it’s the closest region to Lagos, Nigeria, where I live.After selecting a region and project name, we’ll click the Create project“ button. See that? It only took us a few seconds to create a new project!
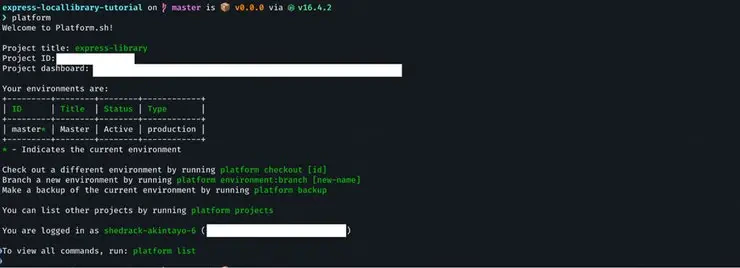
After we create our project, we’ll see a management console displaying various details about the project. The next thing we’ll do is connect my Platform.sh account with the CLI by running the following command in my terminal:
platform
The above command will ask you to authenticate and then direct you to allow access to your account on a localhost page. If the authentication is successful, we’ll see the following in the terminal window.After this, we need to set up our Node application for deployment by creating some files to aid the deployment process.
This folder contains two files: routes.yaml and services.yaml. The routes.yaml file contains all the necessary URL configurations our application needs, from redirects to a domain name to external services.In the routes.yaml file, we’ll specify the following based on the official documentation:
# The routes of the project.## Each route describes how an incoming URL is going# to be processed by Platform.sh."https://{default}/": type: upstream upstream: "expresslibrary:http"
(You can read more about routes here.)The services.yaml file contains a specification of whatever service our application will need to work properly; it could be a database service or a cache service like Redis. Since the node application doesn’t need any service at the moment, let’s leave it empty.(You can read more about services here.)
We’ll split the file into sections so we can see exactly what is going on and how it helps with the whole deployment process.
name: expresslibrarytype: "nodejs:14"disk: 2048
In this part, we are simply specifying the app name, the image type and version, and the disk size. The name of the app must match the upstream name in the routes.yaml file.
# The following block defines a single writable directory, 'web/uploads'# The 'source' specifies where the writable mount is. The 'local' source# indicates that the mount point will point to a local directory on the# application container. The 'source_path' specifies the subdirectory.# from within the source that the mount should point at.mounts: "web/uploads": source: local source_path: uploads
Over here we’re specifying writable local storage for the application. If your application doesn’t need writable local file storage, you can omit the mounts section and set the disk to the minimum value of 256 Mb. (Read more about mounts here.)There are a few things to unpack when it comes to mounts in Platform.sh. The entire app is read-only post-build, which makes it almost impossible to write to your application disk. Mounts exist to give you the power to write to your application post-build. All you need to do is mount the folder/directory, and you’re good to go. This protects your application from being affected by any malicious change.Although this is obviously a good thing, at some point it becomes a bit of a worry. As an application gets larger, you might need a lot of mounts, and this can make the configuration file a bit convoluted.
web:
  commands:
    start: "node server.js"
Over here we’re specifying the command the Node application needs to start its web server. (Read more about the web process here.)Now that we’ve configured the application and added the necessary files, all we need to do is to push the application.
To push our application to Platform.sh, we need to set the project remote by running the following command:
platform project:set-remote <your project id>
This might not be necessary the first time you create a project with the CLI because Platform.sh will automatically do that for you when you authenticate with the CLI if you recently created the project.The next thing we do is commit and push the project by running the following:
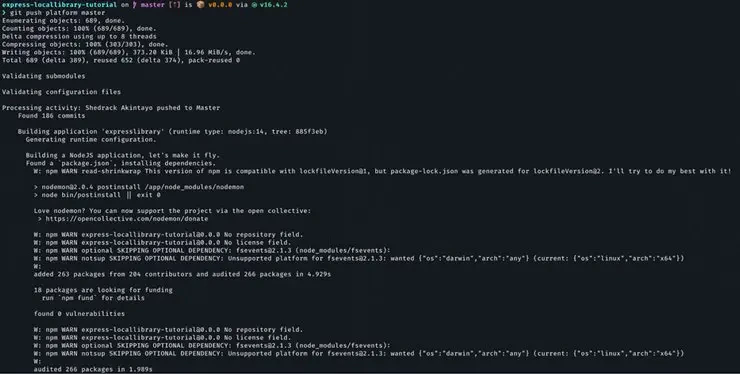
This is the Git-based architecture I was referring to in the above section.As the deployment starts, we’ll see the following displayed on the terminal.
We can see a few things happening during the deployment process:
Platform.sh scans through the application folder to look for the .platform.app.yaml file. The file will help it understand how the deployment process is supposed to happen.
After discovering the configuration file, It begins to build the application based on the language type we’ve specified in the .platform.app.yaml file and installs all the applications dependencies. This process is similar to using a Buildpack in Heroku and Cloud Foundry. Buildpacks help provide a runtime environment for your application.
It also checks if any command that should be part of the build process has been specified in the build hook.
After the build is finished, it proceeds to provision a certificate for the application cluster. It’s similar to using certificates in Kubernetes, but you don’t have to do it yourself or use any external service.
After the certificates have been created, it starts the application environment with all the required services and relationships specified in the services.yaml and .platform.app.yaml files.
Lastly, it generates a bunch of routes or the application according to what has been specified in the routes.yaml file.
The entire deployment process is pretty short and straightforward. I personally like it because I know exactly what’s going on at various stages.
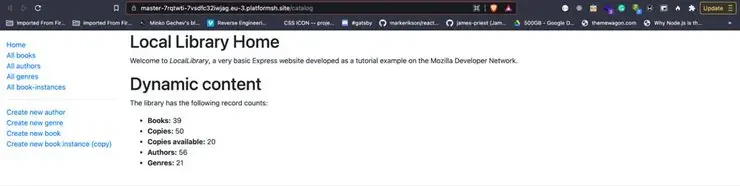
After the deployment process is completed, we can view the application live in the browser. In order to view the application, we run the following command to get the application URL.
platform url
After running the command, we need to select an HTTP or HTTPS route. Either of them works, but selecting HTTPS is always advisable because of security and safe browsing.After selecting our route, we’ll see the application rendered in the browser window.And with that, we’ve successfully deployed our first application on Platform.sh 🚀
The whole experience was pretty straightforward, especially since I’m coming from a Heroku/Cloud Foundry background. It was much easier to deploy my first application compared to these platforms. Platform.sh also allowed me to control my entire infrastructure from my terminal and with the management console, which is pretty slick.In the end, using Platform.sh saved me a lot of stress and time by providing all of the needed infrastructure toolings out of the box. I didn’t need to set up a Kubernetes cluster or create a Docker image for my application, which is a relief. It is developer-friendly and built for modern software development teams.As I continue learning more about using Platform.sh, I’ll return here to share my new-found knowledge. Until then, happy building!
Last modified on June 5, 2026
Was this page helpful?
Assistant
Responses are generated using AI and may contain mistakes.


 Dispatch
 Cloud
Cloud