{authors.length > 0 &&
}
{authors.map(slug => {
const {name, url, avatarUrl} = resolveAuthor(slug);
const inner = <>
{avatarUrl &&  }
{name}
;
return url ?
{inner}
: {inner};
})}
}
{name}
;
return url ?
{inner}
: {inner};
})}
}
{authors.length > 0 && formattedDate && }
{formattedDate && {formattedDate}}
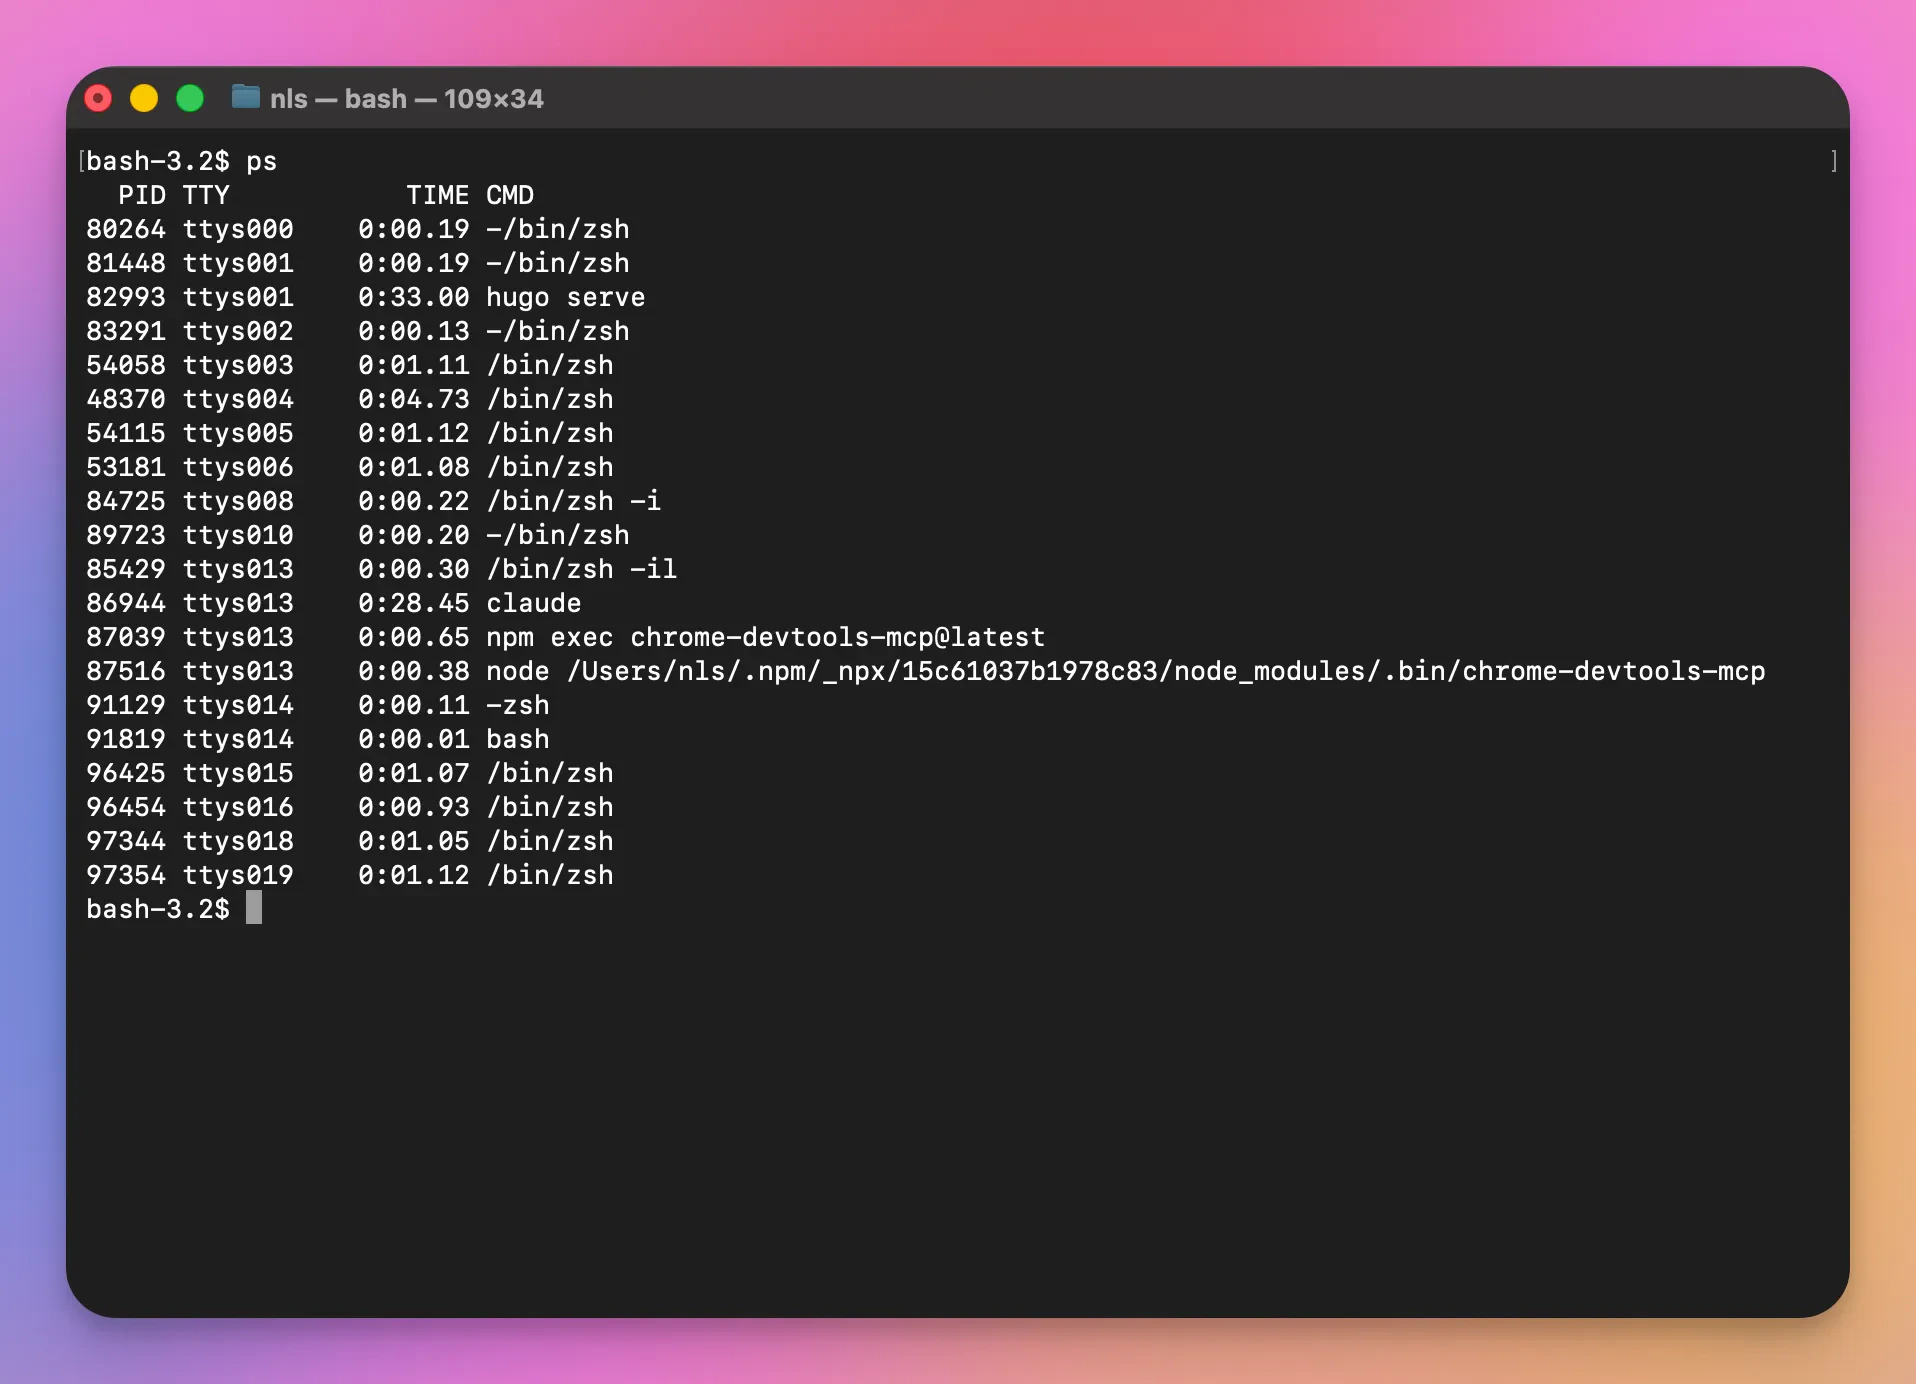 And sure, you *could* live with it. Plenty of people do. But why would you want to when you spend half your day in that thing?
I've been down the terminal customization rabbit hole more times than I'd like to admit. I've tried iTerm2, Alacritty, Kitty, Warp, and probably a dozen others I've forgotten about. I've cycled through Zsh frameworks, tried Nushell for a hot minute, and even flirted with exotic shells that promised to revolutionize my workflow.
But I think I've finally landed on a setup that actually *works*. It's fast, it looks good, it's packed with genuinely useful features, and most importantly, it gets out of my way when I need to get stuff done.
And sure, you *could* live with it. Plenty of people do. But why would you want to when you spend half your day in that thing?
I've been down the terminal customization rabbit hole more times than I'd like to admit. I've tried iTerm2, Alacritty, Kitty, Warp, and probably a dozen others I've forgotten about. I've cycled through Zsh frameworks, tried Nushell for a hot minute, and even flirted with exotic shells that promised to revolutionize my workflow.
But I think I've finally landed on a setup that actually *works*. It's fast, it looks good, it's packed with genuinely useful features, and most importantly, it gets out of my way when I need to get stuff done.
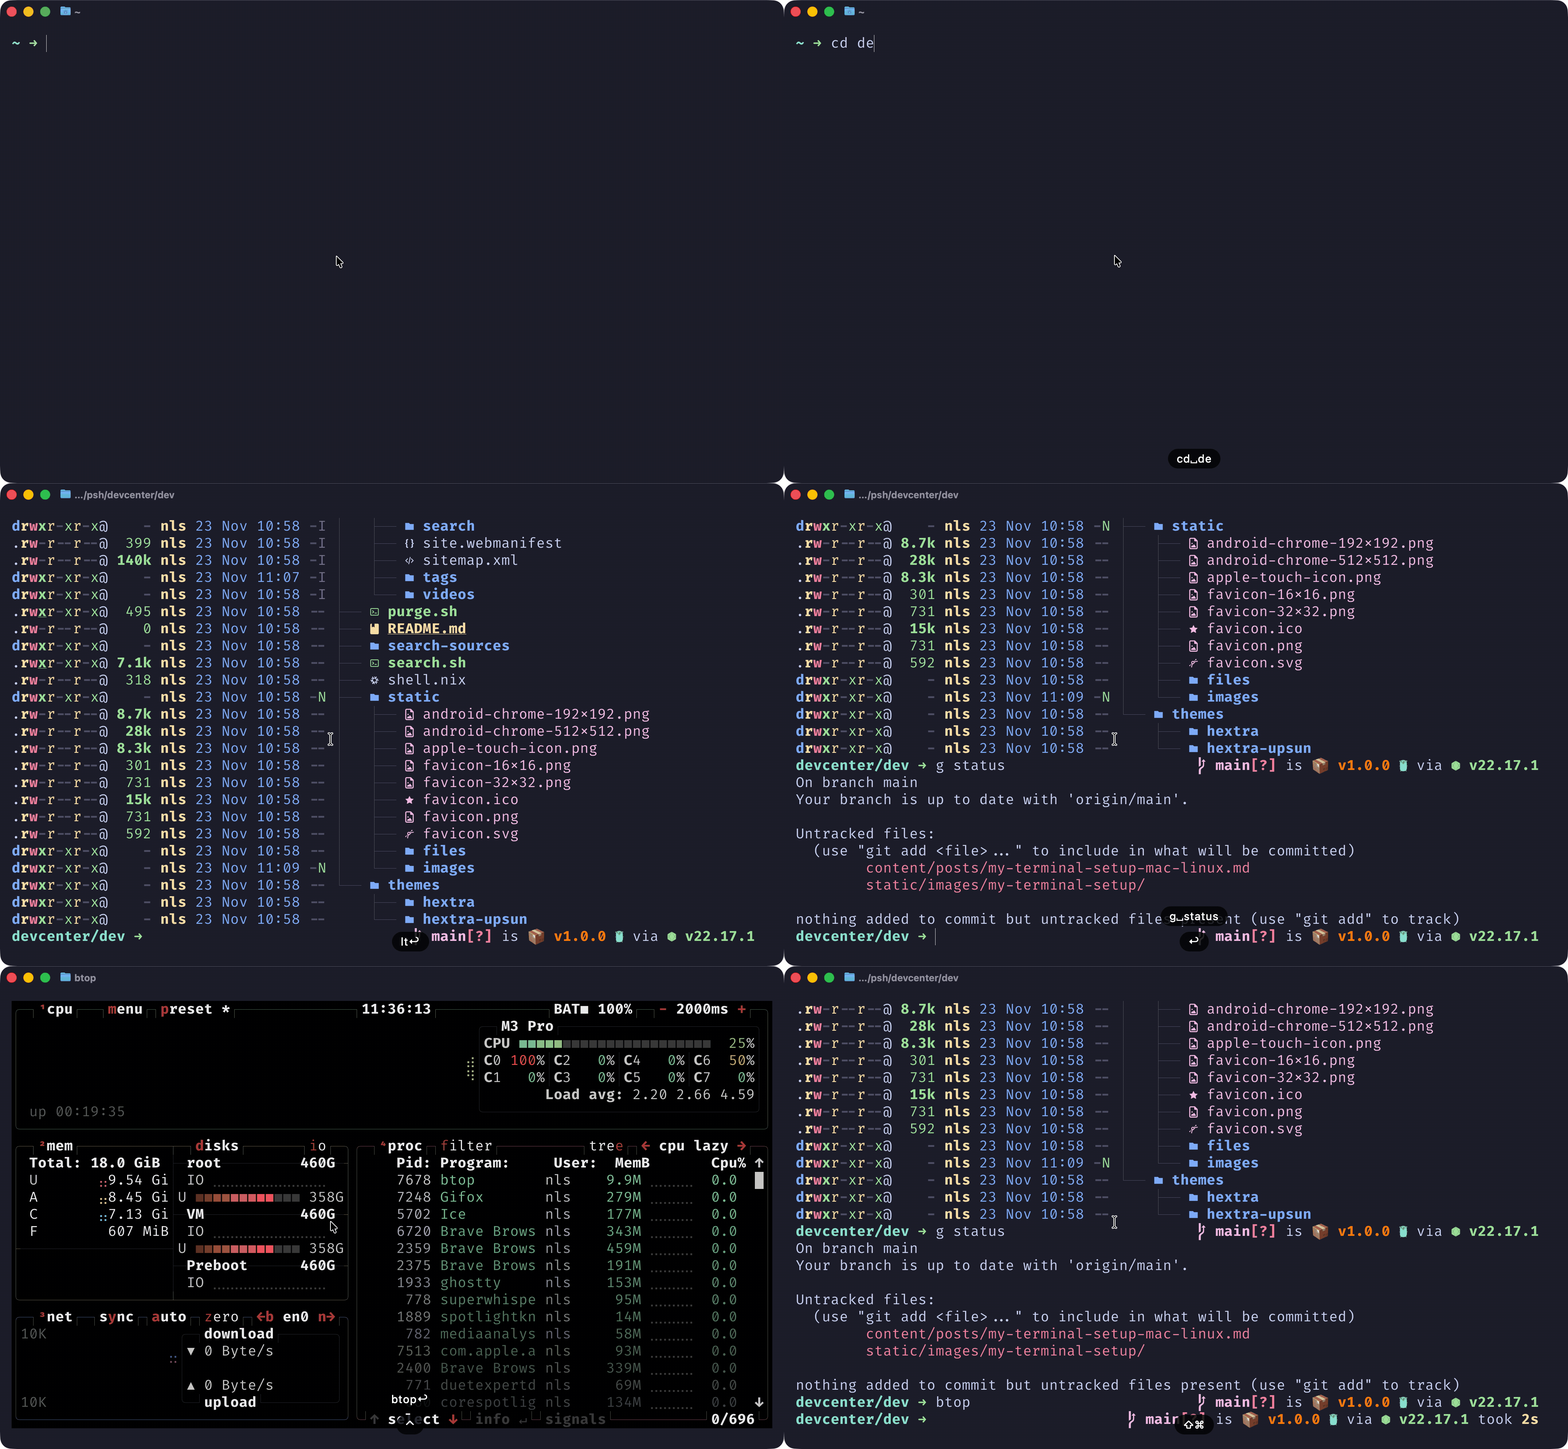 So here's the deal: I'm going to walk you through my current terminal setup that works beautifully on both macOS and Linux. We'll start with GhostTTY (the new kid on the block that's actually worth the hype), configure a shell environment that doesn't suck, set up NeoVim with LazyVim for those times when you need a proper editor, and top it all off with Claude Code integration because, let's face it, AI assistance in your terminal is pretty sweet.
Ready? Let's turn that sad default terminal into something you'll actually enjoy using.
## My palette of choice
So here's the deal: I'm going to walk you through my current terminal setup that works beautifully on both macOS and Linux. We'll start with GhostTTY (the new kid on the block that's actually worth the hype), configure a shell environment that doesn't suck, set up NeoVim with LazyVim for those times when you need a proper editor, and top it all off with Claude Code integration because, let's face it, AI assistance in your terminal is pretty sweet.
Ready? Let's turn that sad default terminal into something you'll actually enjoy using.
## My palette of choice
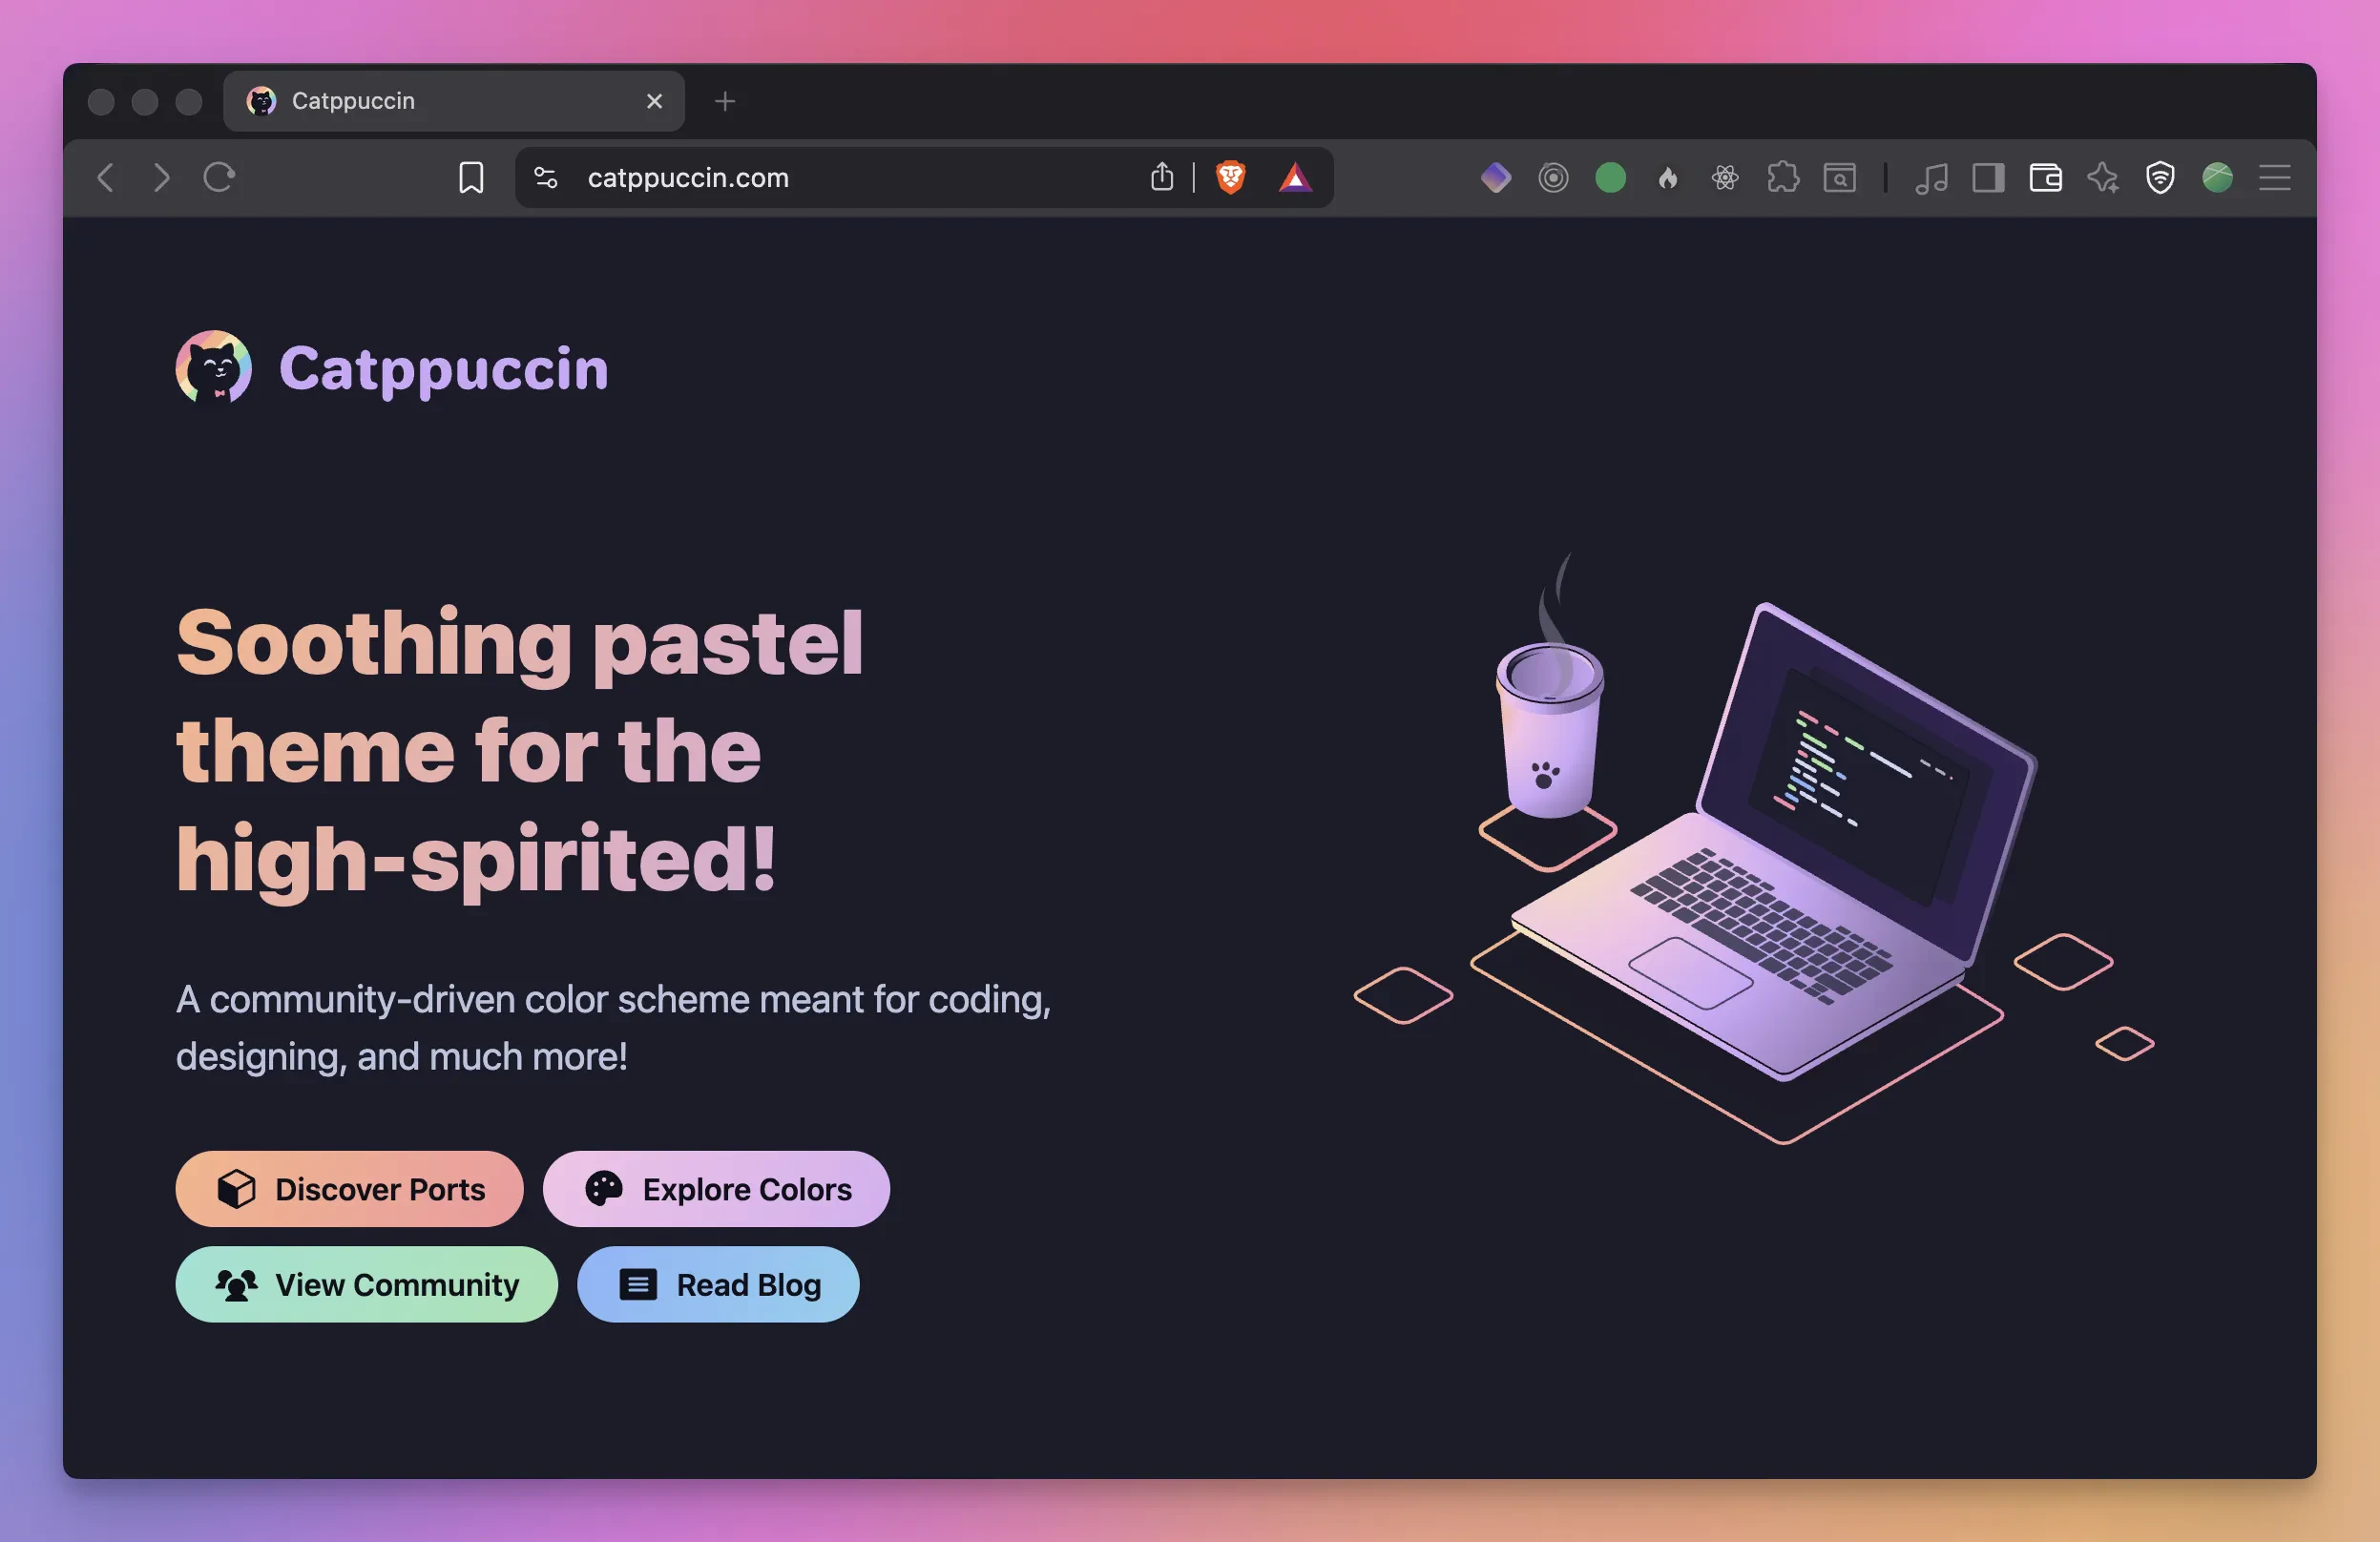 Before we dive into specific tools, let's talk about something that ties everything together: color schemes. I've tried dozens over the years: Dracula, Nord, Gruvbox, Solarized, One Dark. And while they're all decent, I kept coming back to one: [Catppuccin](https://catppuccin.com/). The [Mocha](https://catppuccin.com/palette/) variant to be exact.
Catppuccin is a community-driven pastel theme that describes itself as "for the high-spirited," and honestly? That's pretty accurate. The colors are soft without being washed out, vibrant without being eye-searing. It's the kind of palette you can stare at for 10 hours straight and not feel like your retinas are being assaulted.
What really sold me on Catppuccin is the consistency. This thing has [ports for *everything*](https://catppuccin.com/ports/). Your terminal? Covered. NeoVim? Of course. VS Code, JetBrains IDEs, Slack, Discord, Firefox, Chrome, Obsidian, Spotify, even your system themes. There's probably a Catppuccin port for it. That means my entire desktop environment has the same cohesive look, which sounds superficial until you realize how jarring it is to jump between apps that all look completely different.
Before we dive into specific tools, let's talk about something that ties everything together: color schemes. I've tried dozens over the years: Dracula, Nord, Gruvbox, Solarized, One Dark. And while they're all decent, I kept coming back to one: [Catppuccin](https://catppuccin.com/). The [Mocha](https://catppuccin.com/palette/) variant to be exact.
Catppuccin is a community-driven pastel theme that describes itself as "for the high-spirited," and honestly? That's pretty accurate. The colors are soft without being washed out, vibrant without being eye-searing. It's the kind of palette you can stare at for 10 hours straight and not feel like your retinas are being assaulted.
What really sold me on Catppuccin is the consistency. This thing has [ports for *everything*](https://catppuccin.com/ports/). Your terminal? Covered. NeoVim? Of course. VS Code, JetBrains IDEs, Slack, Discord, Firefox, Chrome, Obsidian, Spotify, even your system themes. There's probably a Catppuccin port for it. That means my entire desktop environment has the same cohesive look, which sounds superficial until you realize how jarring it is to jump between apps that all look completely different.
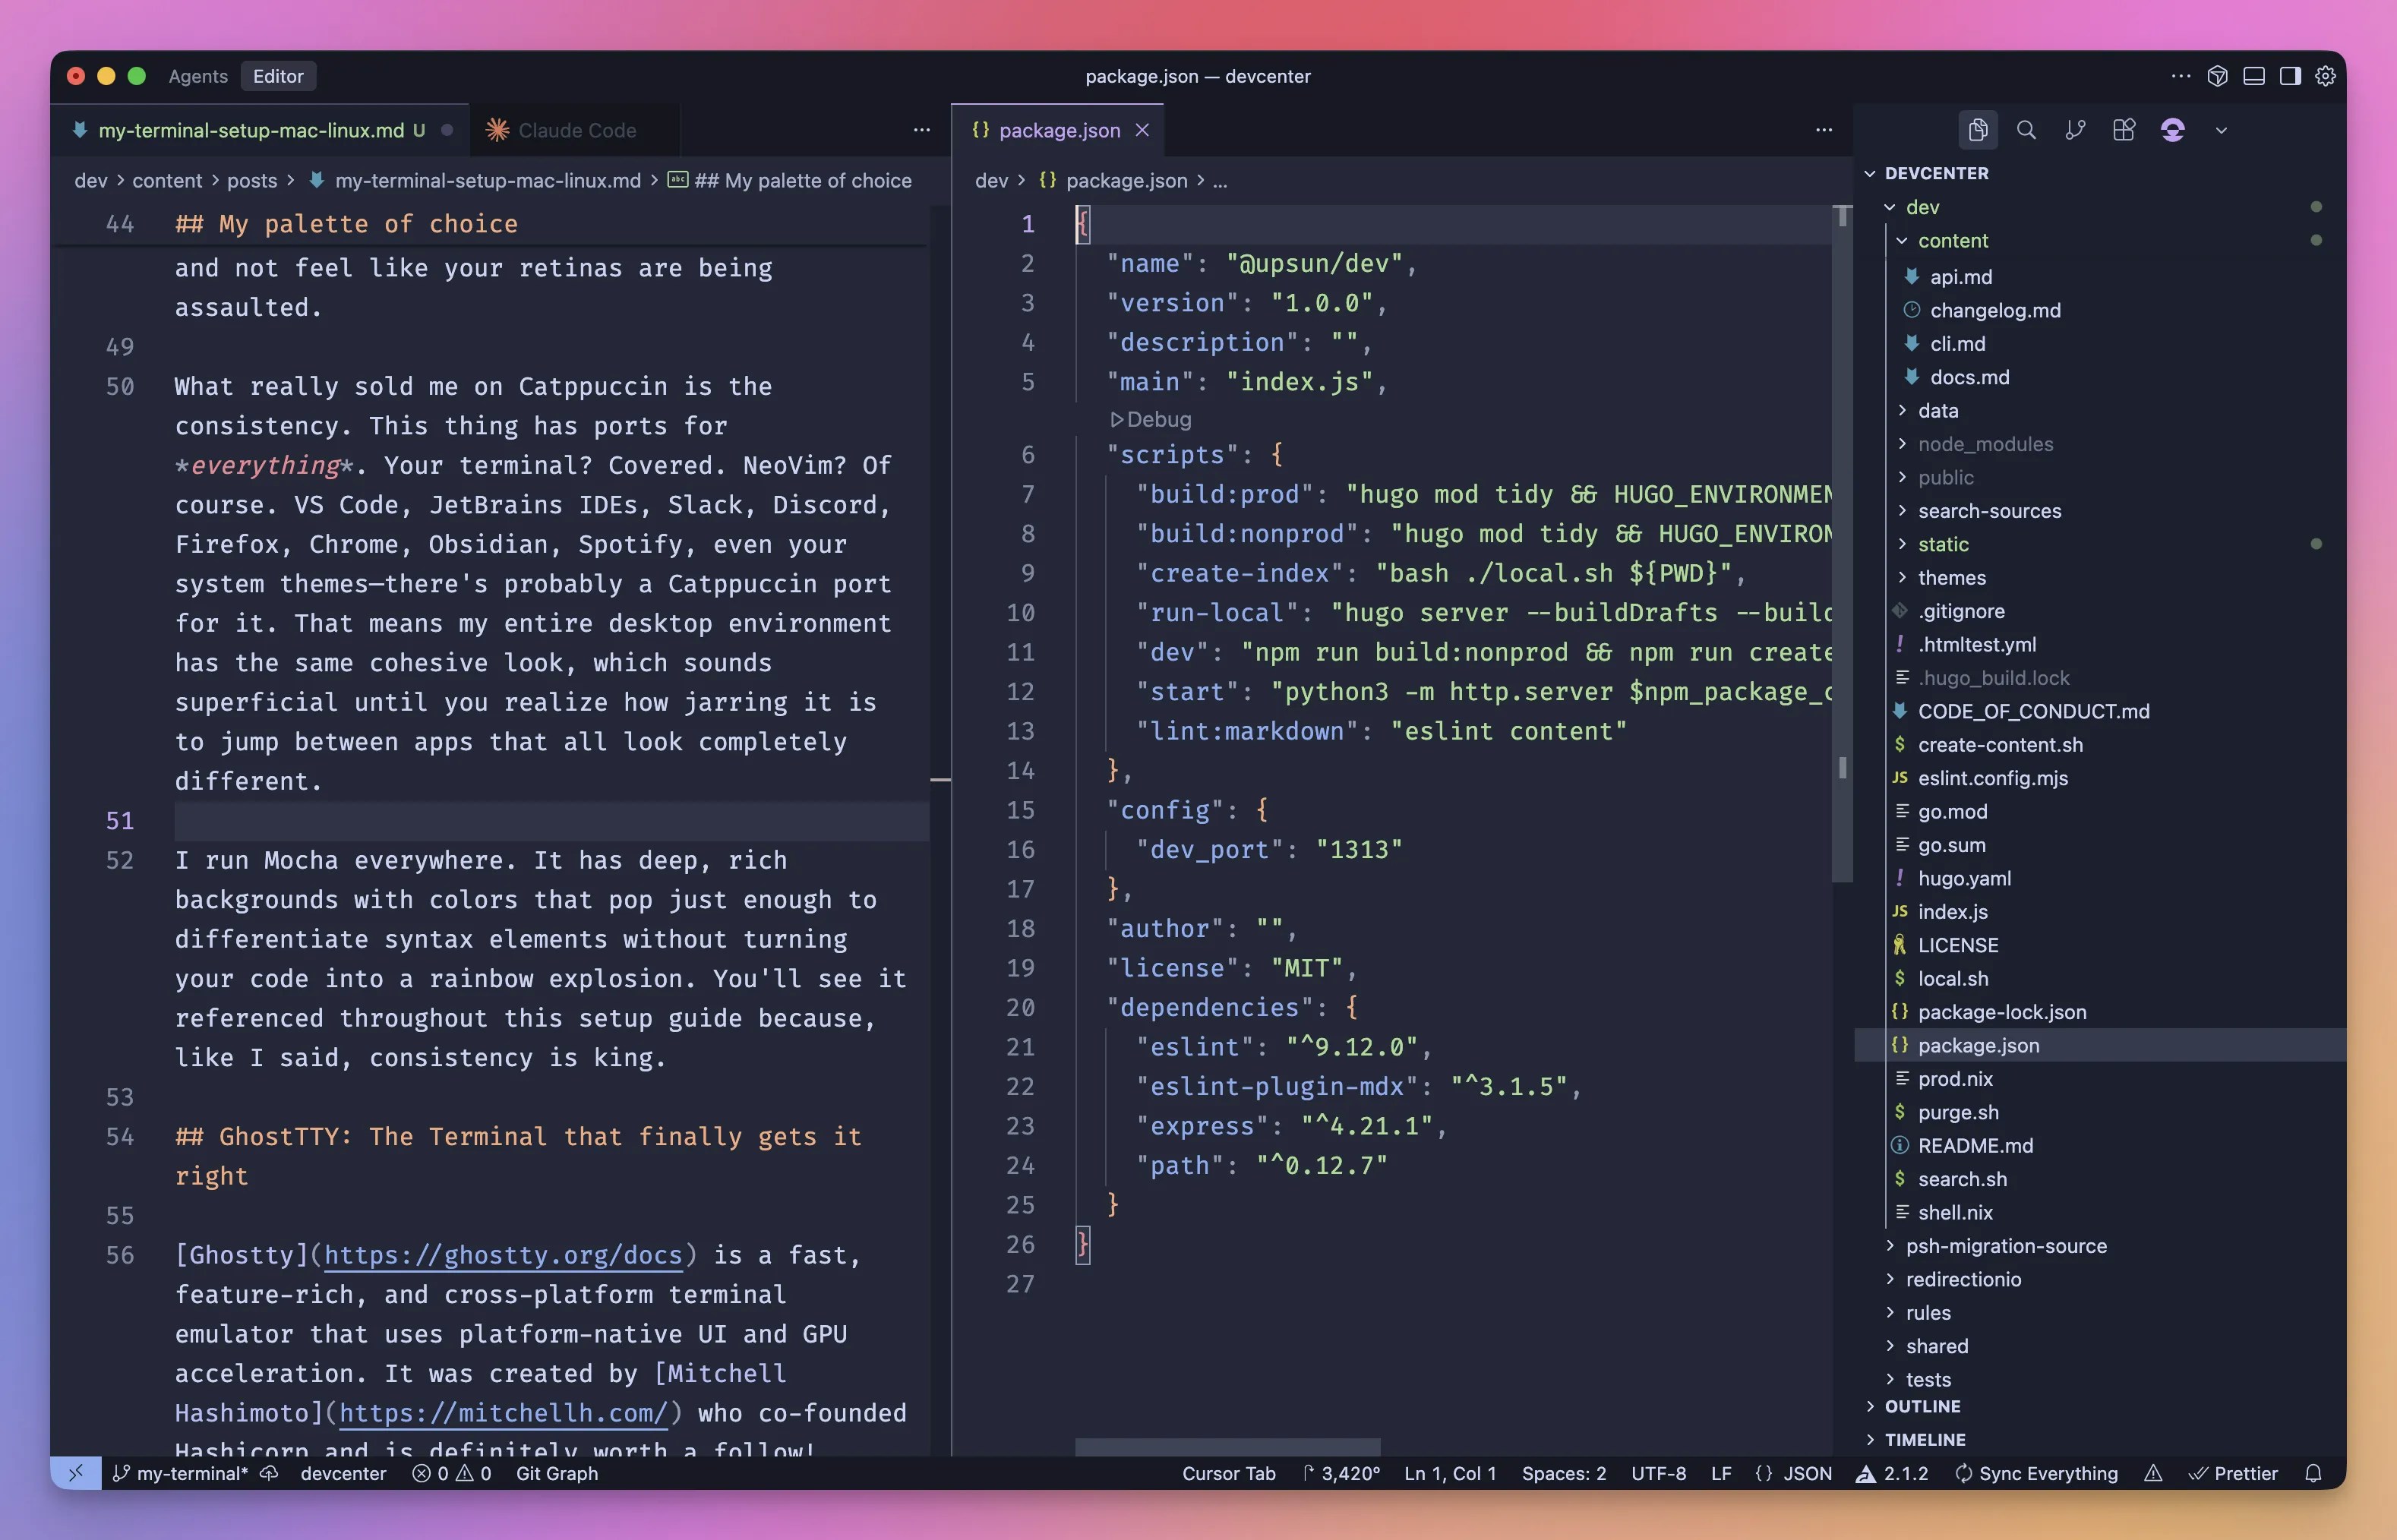 I run [Mocha](https://catppuccin.com/palette/) everywhere. It has deep, rich backgrounds with colors that pop just enough to differentiate syntax elements without turning your code into a rainbow explosion. You'll see it referenced throughout this setup guide because, like I said, consistency is king.
## My preferred font: Fira Code
Talking about consistency, I love having matching fonts in all my daily tools. A good monospace font might seem like a minor detail, but when you're staring at code for hours, it makes a real difference.
[Fira Code](https://github.com/tonsky/FiraCode/) has been my go-to for years. It's a free, open-source monospaced font designed specifically for developers, and its killer feature is **ligatures**. You know how operators like `->`, `<=`, `!=`, or `===` are technically multiple characters but represent single logical concepts? Fira Code renders them as unified glyphs. It sounds gimmicky until you try it. Suddenly your code just *looks* cleaner and is easier to scan.
But here's the thing: if you want fancy icons in your terminal prompt (git branch symbols, folder icons, language logos), you need more than just Fira Code. You need the **Nerd Font** version.
[Nerd Fonts](https://github.com/ryanoasis/nerd-fonts) is a project that patches popular programming fonts with thousands of additional glyphs from icon sets like Font Awesome, Devicons, Octicons, and Powerline symbols. The [Fira Code Nerd Font](https://github.com/ryanoasis/nerd-fonts/tree/master/patched-fonts/FiraCode) gives you all the ligature goodness *plus* the icons that make modern shell prompts and file explorers look gorgeous.
Installing is straightforward:
```bash {filename="Terminal"} theme={null}
# Mac
brew install --cask font-fira-code-nerd-font
# Ubuntu/Debian
sudo apt install fonts-firacode
# For the Nerd Font version, download from the releases page
# or use the official install script:
curl -fsSL https://raw.githubusercontent.com/ryanoasis/nerd-fonts/master/install.sh | bash -s -- FiraCode
```
### Other solid options
Fira Code isn't the only game in town. Here are some other excellent monospace fonts worth considering:
* **[JetBrains Mono](https://www.jetbrains.com/lp/mono/)** - Created by JetBrains, excellent ligatures and optimized for reading code. Very popular.
* **[Ubuntu Mono](https://fonts.google.com/specimen/Ubuntu+Mono)** - Clean and highly readable, the default on Ubuntu systems.
* **[Cascadia Code](https://github.com/microsoft/cascadia-code)** - Microsoft's modern font with ligatures, designed for Windows Terminal.
* **[Source Code Pro](https://github.com/adobe-fonts/source-code-pro)** - Adobe's take on a programming font, clean and professional.
* **[Hack](https://sourcefoundry.org/hack/)** - Designed for source code, great readability at small sizes.
All of these have Nerd Font versions available, so pick whatever looks best to you. The important thing is to actually *choose* a font rather than settling for whatever your system defaults to.
## GhostTTY: The Terminal that finally gets it right
[Ghostty](https://ghostty.org/docs) is a fast, feature-rich, and cross-platform terminal emulator that uses platform-native UI and GPU acceleration. It was created by [Mitchell Hashimoto](https://mitchellh.com/) who co-founded Hashicorp and is definitely worth a follow!
```bash {filename="Terminal"} theme={null}
# Mac
brew install --cask ghostty
# Ubuntu using snap
snap install ghostty --classic
```
For more options, head to [the install guide](https://ghostty.org/docs/install/binary). One great thing about Ghostty is the simplicity of the configuration file. Here is mine:
```bash {filename="~/.config/ghostty/config"} theme={null}
theme = catppuccin-mocha.conf
font-size = 19
font-family = FiraCode Nerd Font Mono
mouse-hide-while-typing = true
window-decoration = true
macos-option-as-alt = true
window-padding-x=12
window-padding-y=12
window-padding-balance=true
```
Feel free to tweak it as you need.
The config references the [catppuccin-mocha.conf available in my dotfiles repository](https://github.com/gmoigneu/dotfiles/blob/main/ghostty/themes/catppuccin-mocha.conf) that should be put in `~/.config/ghostty/themes/`.
## `which` shell?
Now that we have a proper terminal emulator, let's make what happens *inside* it actually useful.
### fish
[fish](https://fishshell.com/) (friendly interactive shell) is my shell of choice. It's actively maintained and is a modern alternative to `bash` or `zsh` that prioritizes usability out of the box. It comes with syntax highlighting, intelligent autosuggestions from your command history, and robust tab completions without any configuration.
Installing and switching to fish is straightforward:
```bash {filename="Terminal"} theme={null}
# On macOS
brew install fish
# On Ubuntu/Debian
sudo apt install fish
# Make it your default shell
chsh -s $(which fish)
```
Log out and back in, and you're running fish. Unlike other shells that drop you into an empty config file, fish just *works* immediately. The syntax highlighting and autosuggestions kick in on first launch without any setup.
However, I've seen rare occasions where some features were not working when launched as the default shell. So instead of changing my user shell, I just launch `fish` over `zsh` within Ghostty:
```bash {filename="~/.config/ghostty/config"} theme={null}
command = /opt/homebrew/bin/fish
```
The main trade-off with fish is that it intentionally breaks from POSIX shell syntax. This means scripts and commands copied from most online tutorials won't work directly in fish unless you run them through `bash`. For me, the improved interactive experience is worth it, and I can always run `bash -c "command"` for POSIX-specific scripts when needed.
I run [Mocha](https://catppuccin.com/palette/) everywhere. It has deep, rich backgrounds with colors that pop just enough to differentiate syntax elements without turning your code into a rainbow explosion. You'll see it referenced throughout this setup guide because, like I said, consistency is king.
## My preferred font: Fira Code
Talking about consistency, I love having matching fonts in all my daily tools. A good monospace font might seem like a minor detail, but when you're staring at code for hours, it makes a real difference.
[Fira Code](https://github.com/tonsky/FiraCode/) has been my go-to for years. It's a free, open-source monospaced font designed specifically for developers, and its killer feature is **ligatures**. You know how operators like `->`, `<=`, `!=`, or `===` are technically multiple characters but represent single logical concepts? Fira Code renders them as unified glyphs. It sounds gimmicky until you try it. Suddenly your code just *looks* cleaner and is easier to scan.
But here's the thing: if you want fancy icons in your terminal prompt (git branch symbols, folder icons, language logos), you need more than just Fira Code. You need the **Nerd Font** version.
[Nerd Fonts](https://github.com/ryanoasis/nerd-fonts) is a project that patches popular programming fonts with thousands of additional glyphs from icon sets like Font Awesome, Devicons, Octicons, and Powerline symbols. The [Fira Code Nerd Font](https://github.com/ryanoasis/nerd-fonts/tree/master/patched-fonts/FiraCode) gives you all the ligature goodness *plus* the icons that make modern shell prompts and file explorers look gorgeous.
Installing is straightforward:
```bash {filename="Terminal"} theme={null}
# Mac
brew install --cask font-fira-code-nerd-font
# Ubuntu/Debian
sudo apt install fonts-firacode
# For the Nerd Font version, download from the releases page
# or use the official install script:
curl -fsSL https://raw.githubusercontent.com/ryanoasis/nerd-fonts/master/install.sh | bash -s -- FiraCode
```
### Other solid options
Fira Code isn't the only game in town. Here are some other excellent monospace fonts worth considering:
* **[JetBrains Mono](https://www.jetbrains.com/lp/mono/)** - Created by JetBrains, excellent ligatures and optimized for reading code. Very popular.
* **[Ubuntu Mono](https://fonts.google.com/specimen/Ubuntu+Mono)** - Clean and highly readable, the default on Ubuntu systems.
* **[Cascadia Code](https://github.com/microsoft/cascadia-code)** - Microsoft's modern font with ligatures, designed for Windows Terminal.
* **[Source Code Pro](https://github.com/adobe-fonts/source-code-pro)** - Adobe's take on a programming font, clean and professional.
* **[Hack](https://sourcefoundry.org/hack/)** - Designed for source code, great readability at small sizes.
All of these have Nerd Font versions available, so pick whatever looks best to you. The important thing is to actually *choose* a font rather than settling for whatever your system defaults to.
## GhostTTY: The Terminal that finally gets it right
[Ghostty](https://ghostty.org/docs) is a fast, feature-rich, and cross-platform terminal emulator that uses platform-native UI and GPU acceleration. It was created by [Mitchell Hashimoto](https://mitchellh.com/) who co-founded Hashicorp and is definitely worth a follow!
```bash {filename="Terminal"} theme={null}
# Mac
brew install --cask ghostty
# Ubuntu using snap
snap install ghostty --classic
```
For more options, head to [the install guide](https://ghostty.org/docs/install/binary). One great thing about Ghostty is the simplicity of the configuration file. Here is mine:
```bash {filename="~/.config/ghostty/config"} theme={null}
theme = catppuccin-mocha.conf
font-size = 19
font-family = FiraCode Nerd Font Mono
mouse-hide-while-typing = true
window-decoration = true
macos-option-as-alt = true
window-padding-x=12
window-padding-y=12
window-padding-balance=true
```
Feel free to tweak it as you need.
The config references the [catppuccin-mocha.conf available in my dotfiles repository](https://github.com/gmoigneu/dotfiles/blob/main/ghostty/themes/catppuccin-mocha.conf) that should be put in `~/.config/ghostty/themes/`.
## `which` shell?
Now that we have a proper terminal emulator, let's make what happens *inside* it actually useful.
### fish
[fish](https://fishshell.com/) (friendly interactive shell) is my shell of choice. It's actively maintained and is a modern alternative to `bash` or `zsh` that prioritizes usability out of the box. It comes with syntax highlighting, intelligent autosuggestions from your command history, and robust tab completions without any configuration.
Installing and switching to fish is straightforward:
```bash {filename="Terminal"} theme={null}
# On macOS
brew install fish
# On Ubuntu/Debian
sudo apt install fish
# Make it your default shell
chsh -s $(which fish)
```
Log out and back in, and you're running fish. Unlike other shells that drop you into an empty config file, fish just *works* immediately. The syntax highlighting and autosuggestions kick in on first launch without any setup.
However, I've seen rare occasions where some features were not working when launched as the default shell. So instead of changing my user shell, I just launch `fish` over `zsh` within Ghostty:
```bash {filename="~/.config/ghostty/config"} theme={null}
command = /opt/homebrew/bin/fish
```
The main trade-off with fish is that it intentionally breaks from POSIX shell syntax. This means scripts and commands copied from most online tutorials won't work directly in fish unless you run them through `bash`. For me, the improved interactive experience is worth it, and I can always run `bash -c "command"` for POSIX-specific scripts when needed.
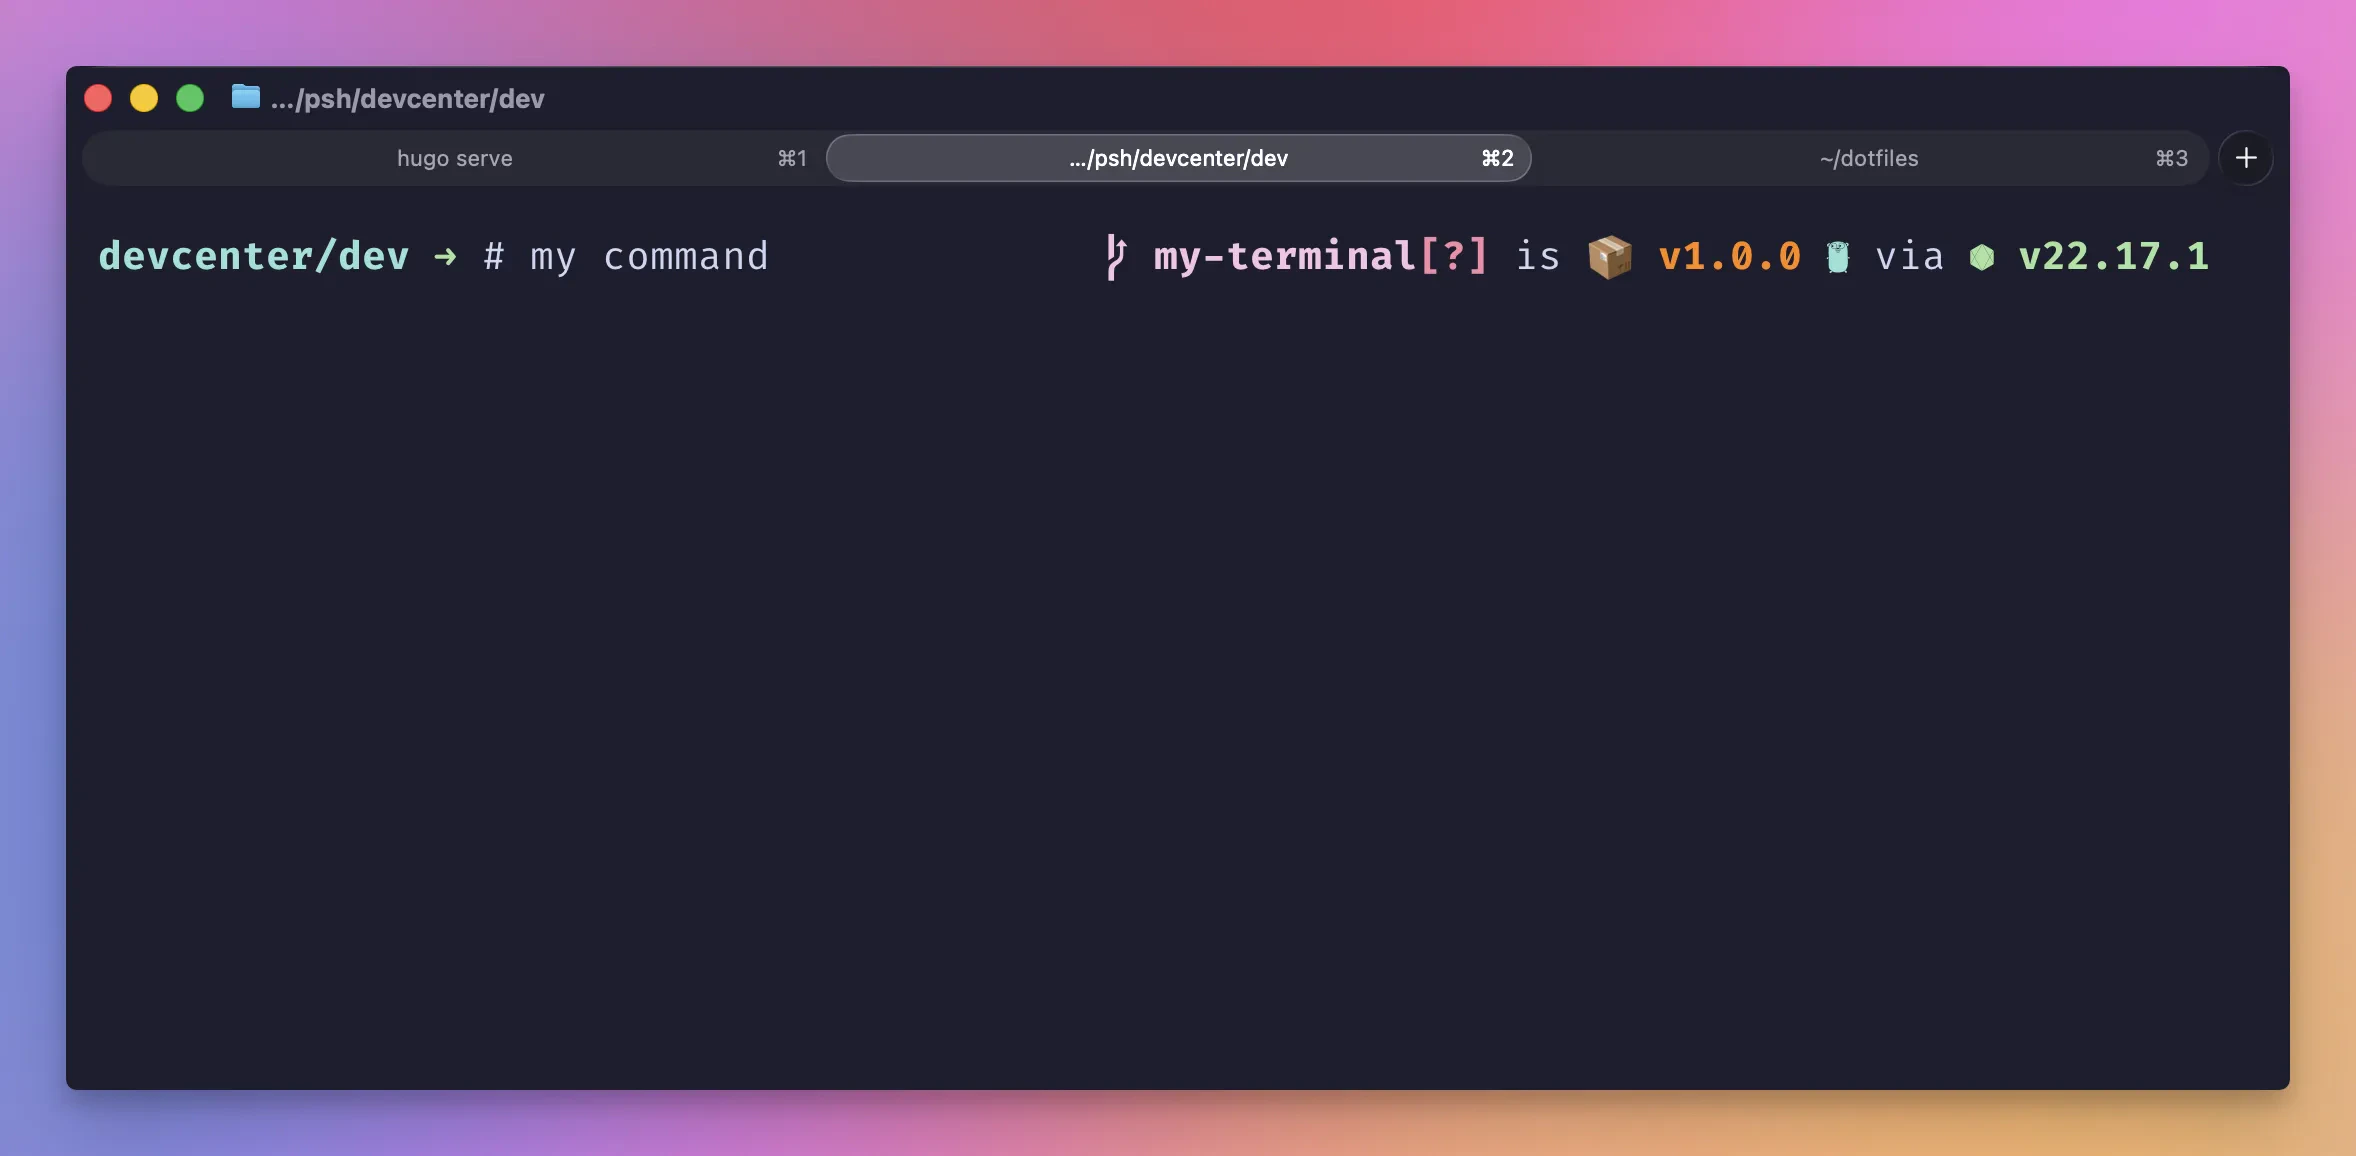 The above screenshot shows that I am in my `devcenter` project/folder on the `my-terminal` git branch with unstaged changes (`[?]`). It shows my `package.json` version (`1.0.0`) as well as my node.js runtime version. Especially useful if you are switching node versions with `nvm` to get rid of compatibility issues between major releases.
Here's [my whole config](https://github.com/gmoigneu/dotfiles/blob/main/starship/starship.toml):
```toml {filename="~/.config/starship.toml"} theme={null}
# Use Catppuccin Mocha palette
palette = "catppuccin_mocha"
# Don't add a newline at the start of the prompt
add_newline = false
# Minimal left prompt
format = """$directory$character"""
# Everything else goes on the right
right_format = """$git_branch$golang$aws"""
[character]
success_symbol = "[➜](bold green)"
error_symbol = "[✗](bold red)"
[directory]
truncation_length = 3
truncate_to_repo = true
[git_branch]
format = "[$symbol$branch(:$remote_branch)]($style) "
[aws]
format = '[$symbol($profile )(\($region\))]($style) '
symbol = " "
style = "bold blue"
# Catppuccin Mocha colors
[palettes.catppuccin_mocha]
rosewater = "#f5e0dc"
flamingo = "#f2cdcd"
pink = "#f5c2e7"
mauve = "#cba6f7"
red = "#f38ba8"
maroon = "#eba0ac"
peach = "#fab387"
yellow = "#f9e2af"
green = "#a6e3a1"
teal = "#94e2d5"
sky = "#89dceb"
sapphire = "#74c7ec"
blue = "#89b4fa"
lavender = "#b4befe"
text = "#cdd6f4"
subtext1 = "#bac2de"
subtext0 = "#a6adc8"
overlay2 = "#9399b2"
overlay1 = "#7f849c"
overlay0 = "#6c7086"
surface2 = "#585b70"
surface1 = "#45475a"
surface0 = "#313244"
base = "#1e1e2e"
mantle = "#181825"
crust = "#11111b"
```
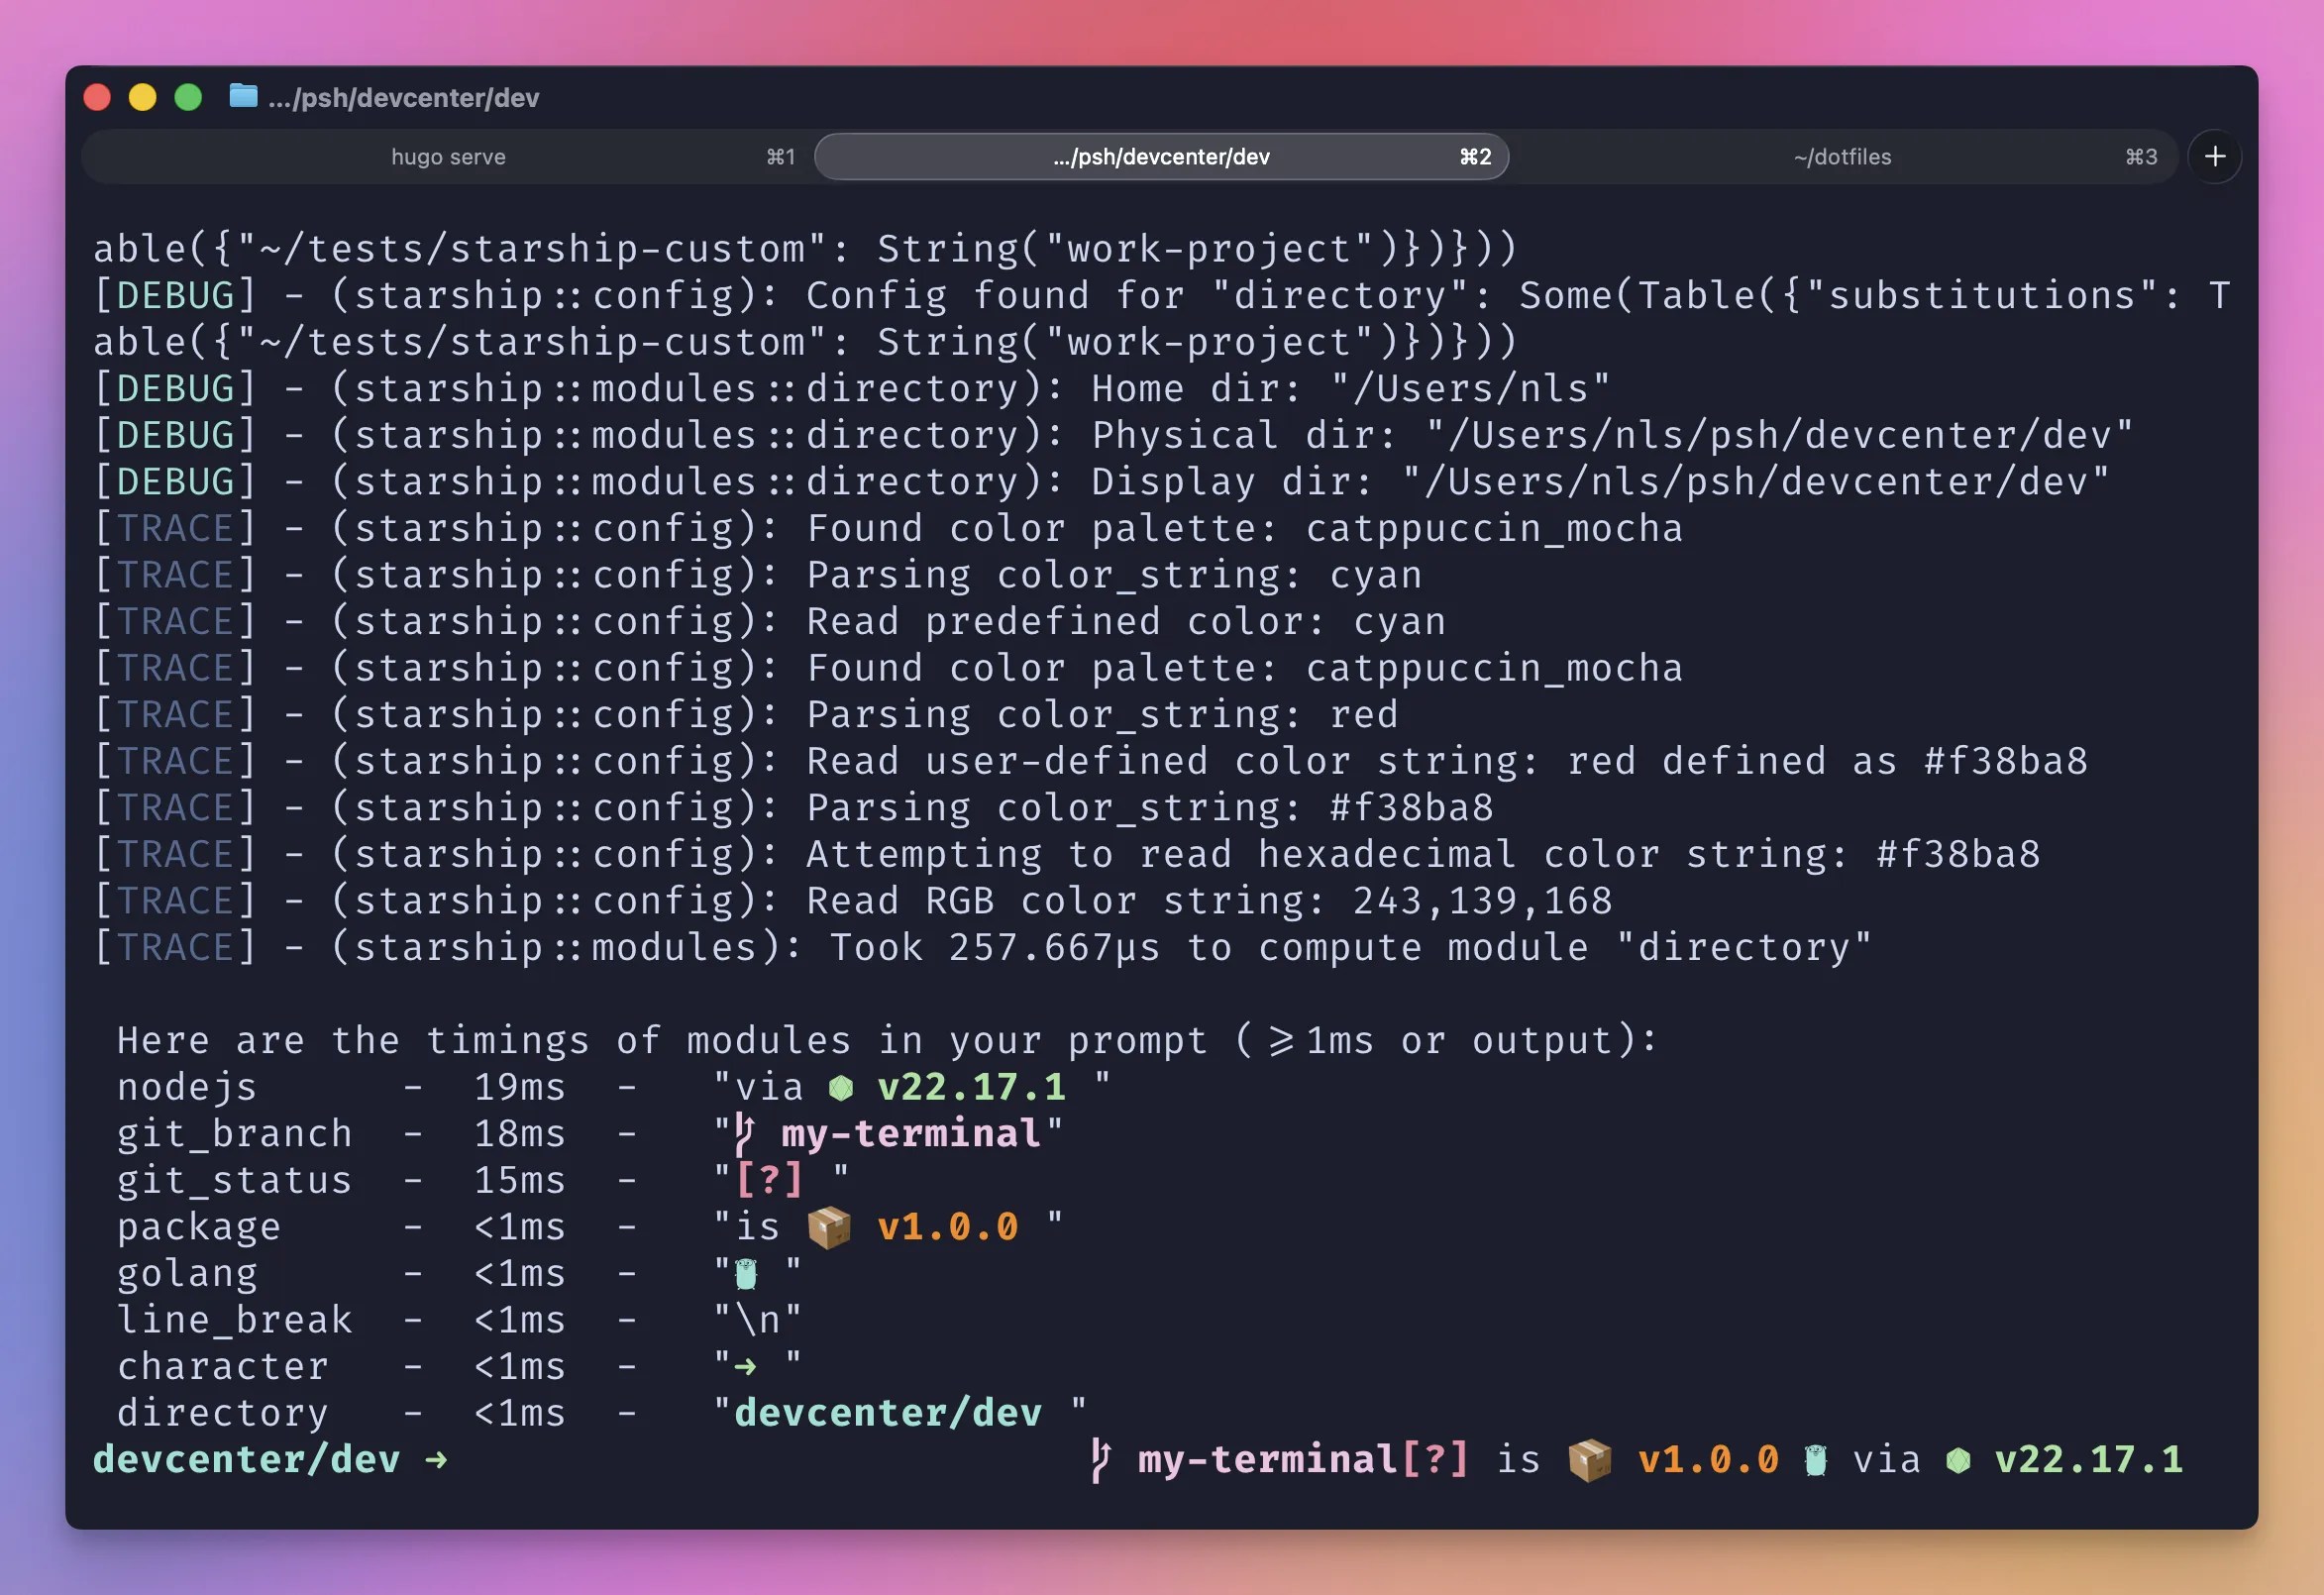
The key here is keeping the left side minimal (just directory and prompt character) while putting contextual info on the right where it doesn't get in the way.
The above screenshot shows that I am in my `devcenter` project/folder on the `my-terminal` git branch with unstaged changes (`[?]`). It shows my `package.json` version (`1.0.0`) as well as my node.js runtime version. Especially useful if you are switching node versions with `nvm` to get rid of compatibility issues between major releases.
Here's [my whole config](https://github.com/gmoigneu/dotfiles/blob/main/starship/starship.toml):
```toml {filename="~/.config/starship.toml"} theme={null}
# Use Catppuccin Mocha palette
palette = "catppuccin_mocha"
# Don't add a newline at the start of the prompt
add_newline = false
# Minimal left prompt
format = """$directory$character"""
# Everything else goes on the right
right_format = """$git_branch$golang$aws"""
[character]
success_symbol = "[➜](bold green)"
error_symbol = "[✗](bold red)"
[directory]
truncation_length = 3
truncate_to_repo = true
[git_branch]
format = "[$symbol$branch(:$remote_branch)]($style) "
[aws]
format = '[$symbol($profile )(\($region\))]($style) '
symbol = " "
style = "bold blue"
# Catppuccin Mocha colors
[palettes.catppuccin_mocha]
rosewater = "#f5e0dc"
flamingo = "#f2cdcd"
pink = "#f5c2e7"
mauve = "#cba6f7"
red = "#f38ba8"
maroon = "#eba0ac"
peach = "#fab387"
yellow = "#f9e2af"
green = "#a6e3a1"
teal = "#94e2d5"
sky = "#89dceb"
sapphire = "#74c7ec"
blue = "#89b4fa"
lavender = "#b4befe"
text = "#cdd6f4"
subtext1 = "#bac2de"
subtext0 = "#a6adc8"
overlay2 = "#9399b2"
overlay1 = "#7f849c"
overlay0 = "#6c7086"
surface2 = "#585b70"
surface1 = "#45475a"
surface0 = "#313244"
base = "#1e1e2e"
mantle = "#181825"
crust = "#11111b"
```
The key here is keeping the left side minimal (just directory and prompt character) while putting contextual info on the right where it doesn't get in the way.
 ### eza: ls, but actually good
The default `ls` command is... fine. But [eza](https://github.com/eza-community/eza) is better in every way. It's a modern replacement with colors, icons, git status integration, and sensible defaults.
```bash {filename="Terminal"} theme={null}
# Mac
brew install eza
# Ubuntu/Debian
sudo apt install eza
```
I alias `ls` to eza so it's automatic. In fish, add this to your `~/.config/fish/config.fish`:
```fish {filename="~/.config/fish/config.fish"} theme={null}
if command -v eza &> /dev/null
alias ls='eza -lh --group-directories-first --icons=auto'
alias lsa='ls -a'
alias lt='eza --tree --level=2 --long --icons --git'
alias lta='lt -a'
end
```
For Zsh users (`~/.zshrc`):
```bash {filename="~/.zshrc"} theme={null}
if command -v eza &> /dev/null; then
alias ls='eza -lh --group-directories-first --icons=auto'
alias lsa='ls -a'
alias lt='eza --tree --level=2 --long --icons --git'
alias lta='lt -a'
fi
```
### eza: ls, but actually good
The default `ls` command is... fine. But [eza](https://github.com/eza-community/eza) is better in every way. It's a modern replacement with colors, icons, git status integration, and sensible defaults.
```bash {filename="Terminal"} theme={null}
# Mac
brew install eza
# Ubuntu/Debian
sudo apt install eza
```
I alias `ls` to eza so it's automatic. In fish, add this to your `~/.config/fish/config.fish`:
```fish {filename="~/.config/fish/config.fish"} theme={null}
if command -v eza &> /dev/null
alias ls='eza -lh --group-directories-first --icons=auto'
alias lsa='ls -a'
alias lt='eza --tree --level=2 --long --icons --git'
alias lta='lt -a'
end
```
For Zsh users (`~/.zshrc`):
```bash {filename="~/.zshrc"} theme={null}
if command -v eza &> /dev/null; then
alias ls='eza -lh --group-directories-first --icons=auto'
alias lsa='ls -a'
alias lt='eza --tree --level=2 --long --icons --git'
alias lta='lt -a'
fi
```
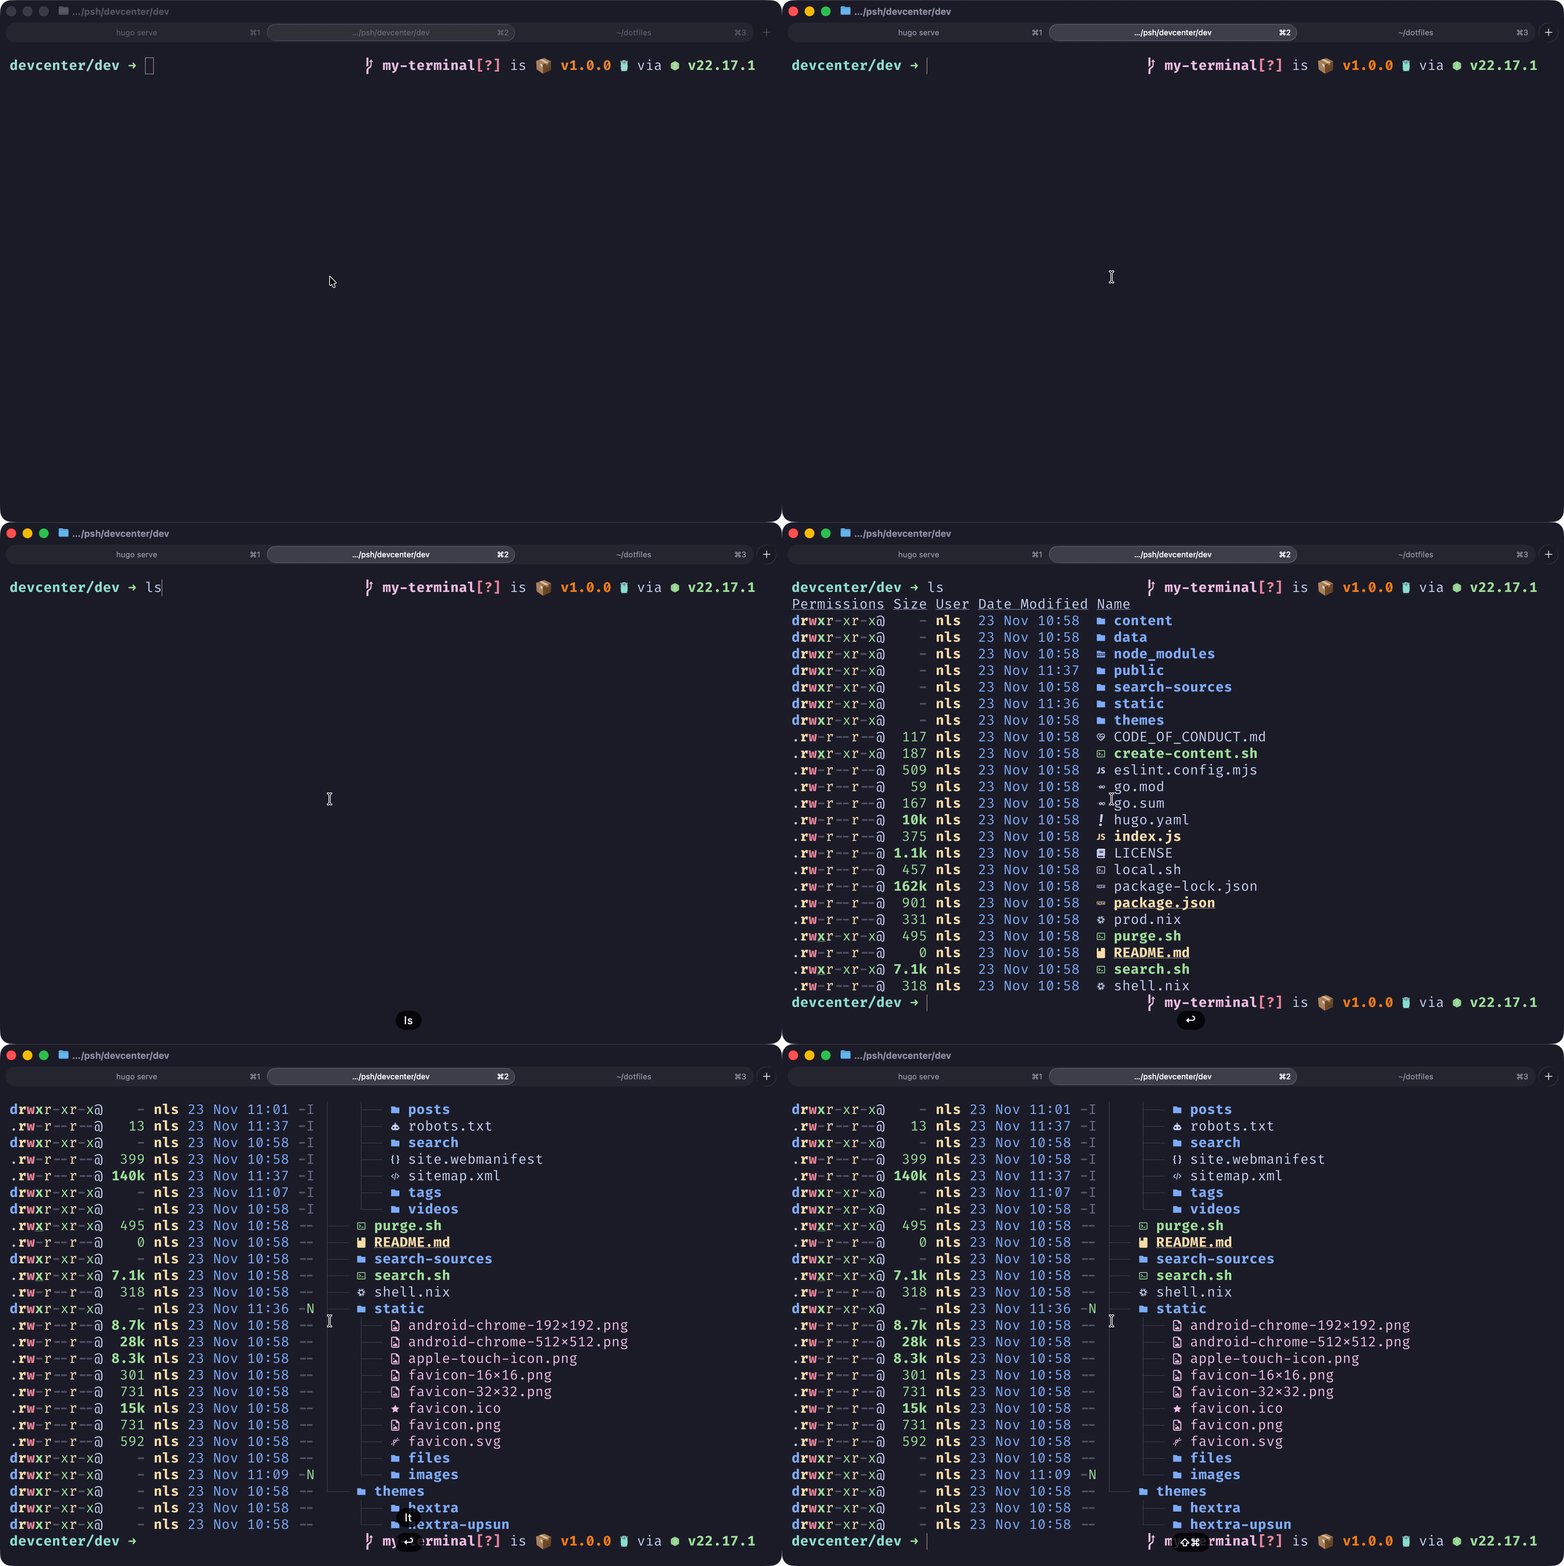 Now `ls` gives you a beautiful, informative file listing. `lt` shows a tree view with git status. Once you've used it, going back to plain `ls` feels painful.
### fzf: Fuzzy find everything
[fzf](https://github.com/junegunn/fzf) is a general-purpose fuzzy finder, and once you start using it, you'll wonder how you ever lived without it. It lets you interactively filter any list: files, command history, processes, git branches, you name it.
```bash {filename="Terminal"} theme={null}
# Mac
brew install fzf
# Ubuntu/Debian
sudo apt install fzf
```
Set up the key bindings and shell integration. For fish:
```fish {filename="~/.config/fish/config.fish"} theme={null}
# Set up fzf key bindings
fzf --fish | source
```
For Zsh:
```bash {filename="~/.zshrc"} theme={null}
# Set up fzf key bindings and fuzzy completion
source <(fzf --zsh)
```
Now you get:
* **Ctrl+R** - Fuzzy search through your command history (game changer)
* **Ctrl+T** - Fuzzy find files and insert the path
* **Alt+C** - Fuzzy find directories and cd into them
Now `ls` gives you a beautiful, informative file listing. `lt` shows a tree view with git status. Once you've used it, going back to plain `ls` feels painful.
### fzf: Fuzzy find everything
[fzf](https://github.com/junegunn/fzf) is a general-purpose fuzzy finder, and once you start using it, you'll wonder how you ever lived without it. It lets you interactively filter any list: files, command history, processes, git branches, you name it.
```bash {filename="Terminal"} theme={null}
# Mac
brew install fzf
# Ubuntu/Debian
sudo apt install fzf
```
Set up the key bindings and shell integration. For fish:
```fish {filename="~/.config/fish/config.fish"} theme={null}
# Set up fzf key bindings
fzf --fish | source
```
For Zsh:
```bash {filename="~/.zshrc"} theme={null}
# Set up fzf key bindings and fuzzy completion
source <(fzf --zsh)
```
Now you get:
* **Ctrl+R** - Fuzzy search through your command history (game changer)
* **Ctrl+T** - Fuzzy find files and insert the path
* **Alt+C** - Fuzzy find directories and cd into them
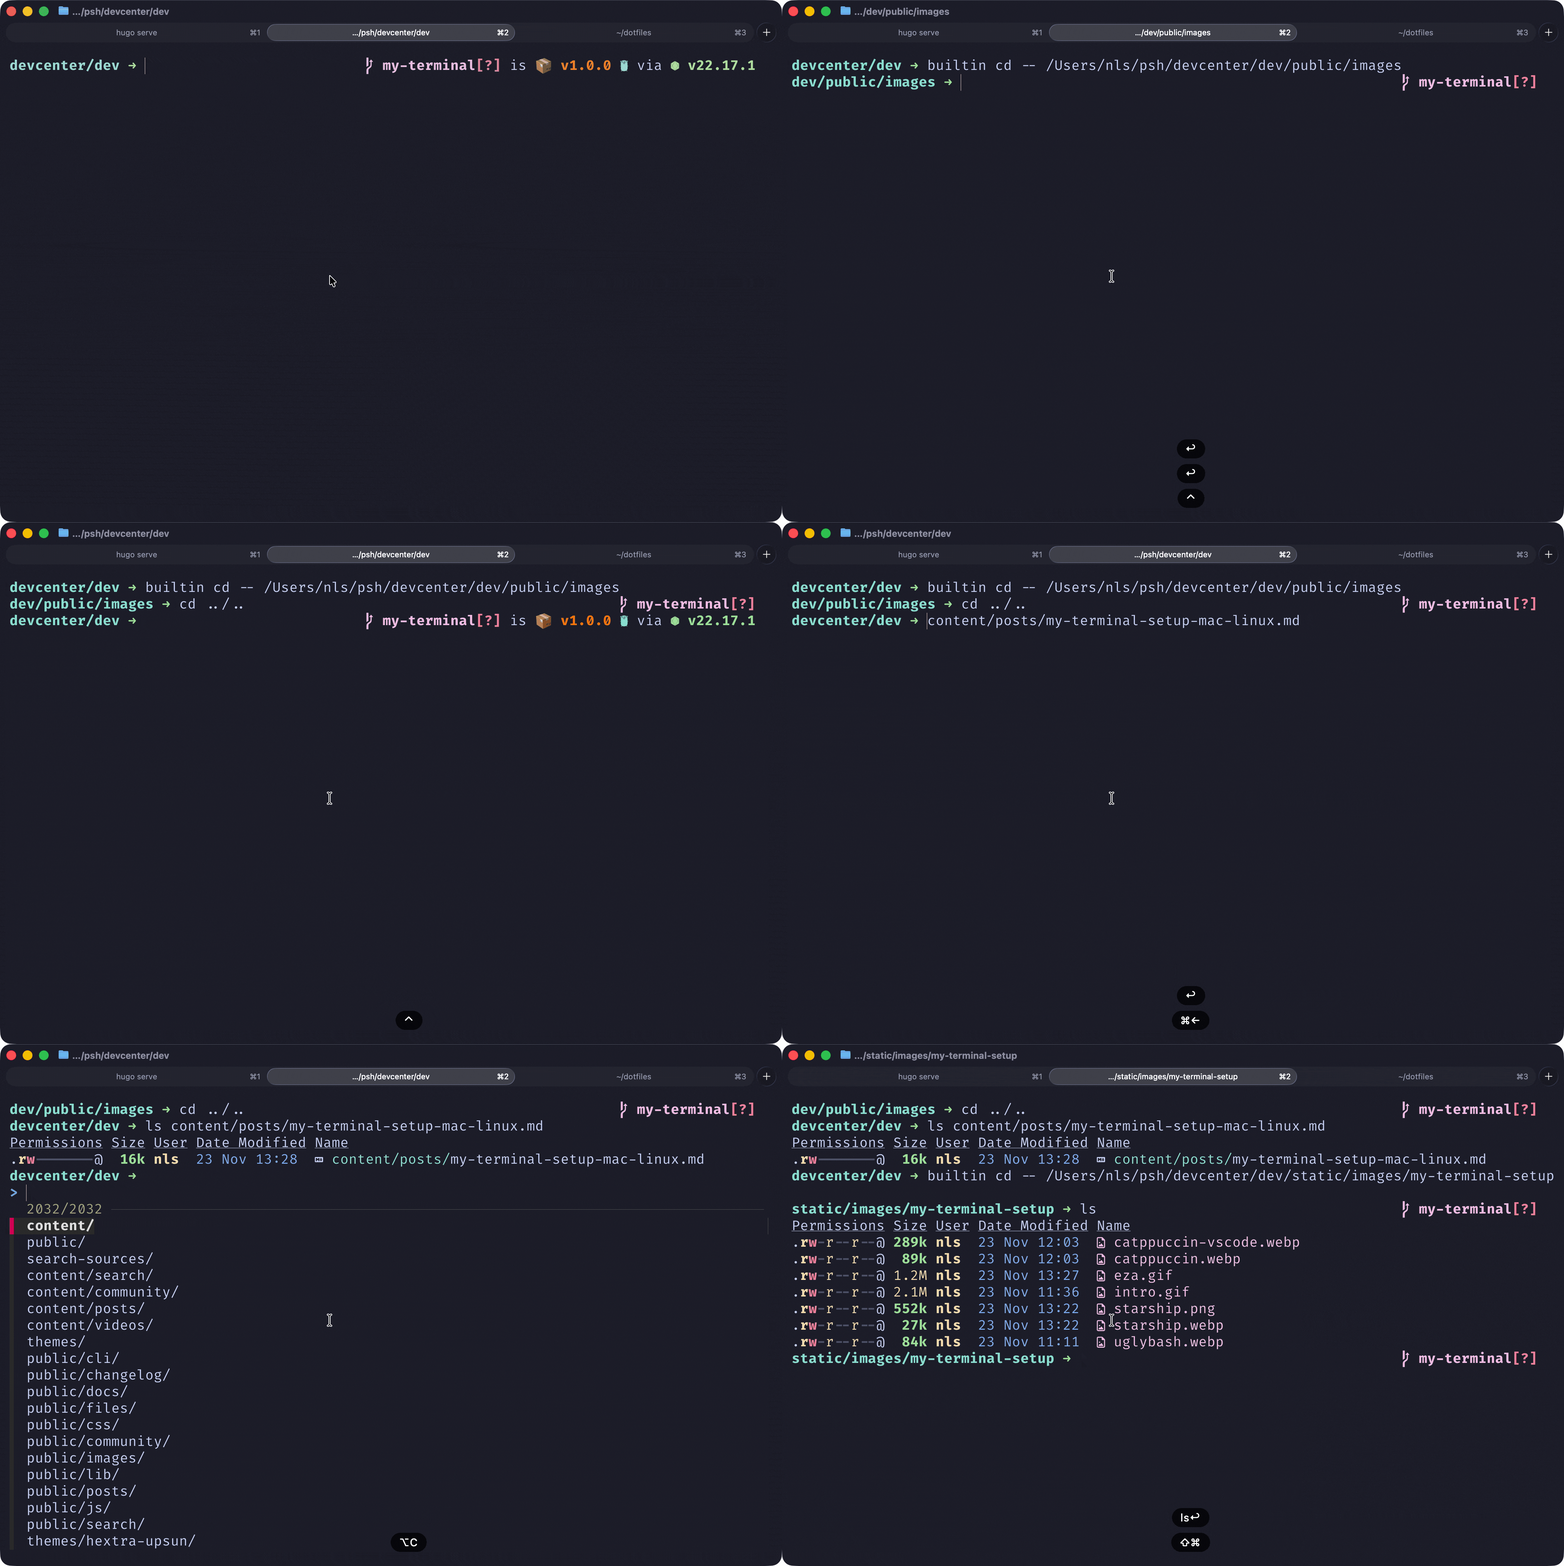 The history search alone is worth the install. Instead of mashing the up arrow trying to find that docker command you ran three days ago, just hit Ctrl+R and type a few characters.
### zoxide: cd that remembers
[zoxide](https://github.com/ajeetdsouza/zoxide) is a smarter `cd` command. It tracks which directories you visit most frequently and lets you jump to them with minimal typing.
```bash {filename="Terminal"} theme={null}
# Mac
brew install zoxide
# Ubuntu/Debian
curl -sSfL https://raw.githubusercontent.com/ajeetdsouza/zoxide/main/install.sh | sh
```
For fish, add this to your config:
```fish {filename="~/.config/fish/config.fish"} theme={null}
zoxide init fish | source
```
For Zsh:
```bash {filename="~/.zshrc"} theme={null}
eval "$(zoxide init zsh)"
```
Now instead of typing `cd ~/projects/company/frontend/src/components`, you just type `z components` and zoxide figures out which "components" directory you probably mean based on your history. The more you use it, the smarter it gets.
The history search alone is worth the install. Instead of mashing the up arrow trying to find that docker command you ran three days ago, just hit Ctrl+R and type a few characters.
### zoxide: cd that remembers
[zoxide](https://github.com/ajeetdsouza/zoxide) is a smarter `cd` command. It tracks which directories you visit most frequently and lets you jump to them with minimal typing.
```bash {filename="Terminal"} theme={null}
# Mac
brew install zoxide
# Ubuntu/Debian
curl -sSfL https://raw.githubusercontent.com/ajeetdsouza/zoxide/main/install.sh | sh
```
For fish, add this to your config:
```fish {filename="~/.config/fish/config.fish"} theme={null}
zoxide init fish | source
```
For Zsh:
```bash {filename="~/.zshrc"} theme={null}
eval "$(zoxide init zsh)"
```
Now instead of typing `cd ~/projects/company/frontend/src/components`, you just type `z components` and zoxide figures out which "components" directory you probably mean based on your history. The more you use it, the smarter it gets.
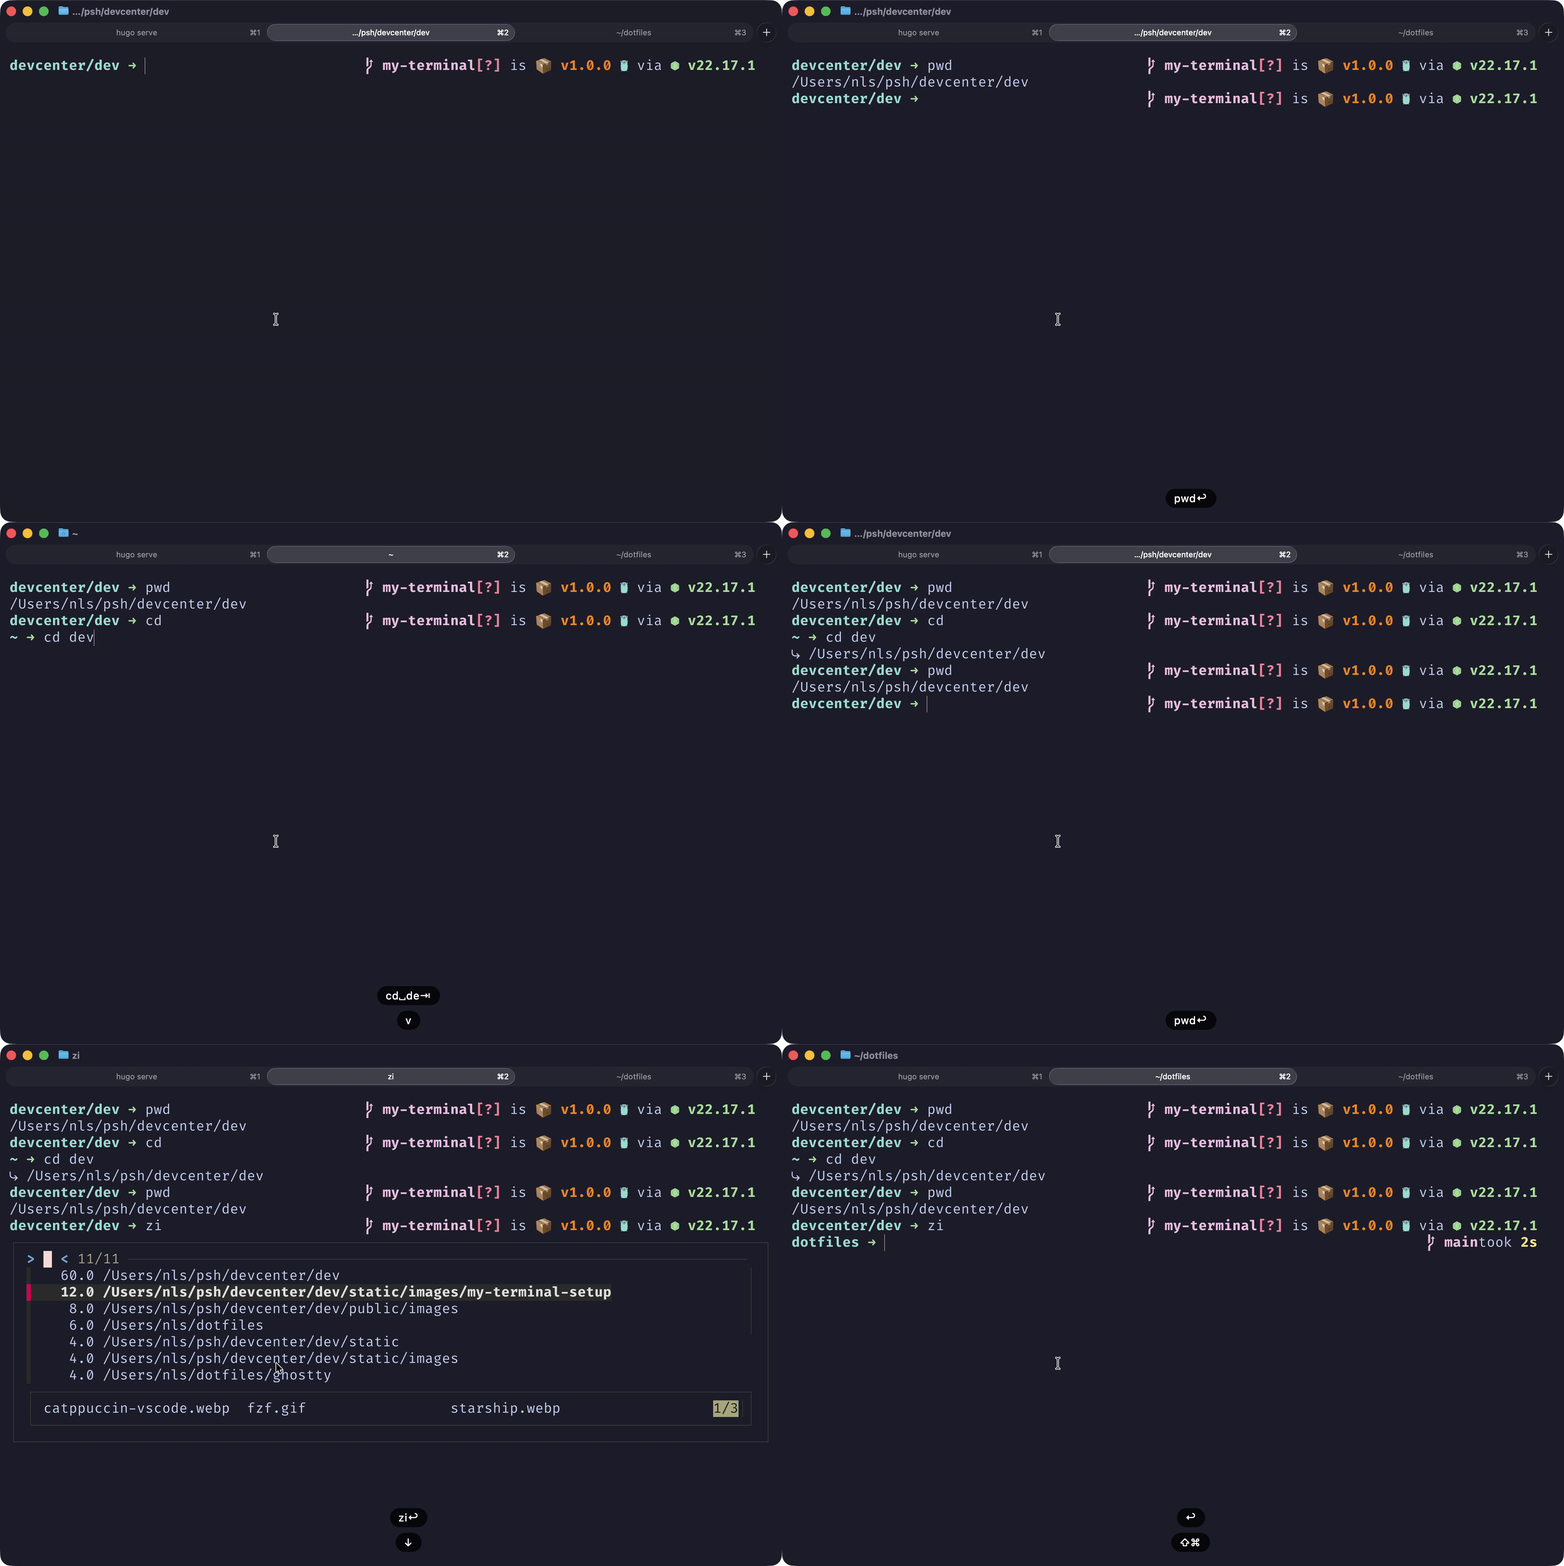 Combine it with fzf for interactive selection: `zi` opens a fuzzy finder with your most-visited directories.
### My aliases
Beyond the tool-specific aliases above, here are some shortcuts I use constantly. In fish:
```fish {filename="~/.config/fish/config.fish"} theme={null}
# Directory navigation
alias ..='cd ..'
alias ...='cd ../..'
alias ....='cd ../../..'
# Tools
alias d='docker'
alias v='nvim'
# Git shortcuts
alias g='git'
alias gcm='git commit -m'
alias gcam='git commit -a -m'
alias gcad='git commit -a --amend'
# Upsun deployment
alias u='upsun'
alias ud='git push upsun && upsun deploy'
```
For Zsh, the syntax is identical, just put these in your `~/.zshrc` instead.
The philosophy here is simple: if you type something more than a few times a day, alias it. Your fingers will thank you.
### Bonus: Nushell
If you're feeling adventurous and want to try something completely different, check out [Nushell](https://www.nushell.sh/). It's a modern shell that treats everything as structured data instead of text strings.
Instead of piping text through `grep` and `awk` and hoping you got the parsing right, Nu pipelines work with actual typed data. You can work with JSON, YAML, SQLite, even Excel files natively. Error messages actually tell you what went wrong and where.
Combine it with fzf for interactive selection: `zi` opens a fuzzy finder with your most-visited directories.
### My aliases
Beyond the tool-specific aliases above, here are some shortcuts I use constantly. In fish:
```fish {filename="~/.config/fish/config.fish"} theme={null}
# Directory navigation
alias ..='cd ..'
alias ...='cd ../..'
alias ....='cd ../../..'
# Tools
alias d='docker'
alias v='nvim'
# Git shortcuts
alias g='git'
alias gcm='git commit -m'
alias gcam='git commit -a -m'
alias gcad='git commit -a --amend'
# Upsun deployment
alias u='upsun'
alias ud='git push upsun && upsun deploy'
```
For Zsh, the syntax is identical, just put these in your `~/.zshrc` instead.
The philosophy here is simple: if you type something more than a few times a day, alias it. Your fingers will thank you.
### Bonus: Nushell
If you're feeling adventurous and want to try something completely different, check out [Nushell](https://www.nushell.sh/). It's a modern shell that treats everything as structured data instead of text strings.
Instead of piping text through `grep` and `awk` and hoping you got the parsing right, Nu pipelines work with actual typed data. You can work with JSON, YAML, SQLite, even Excel files natively. Error messages actually tell you what went wrong and where.
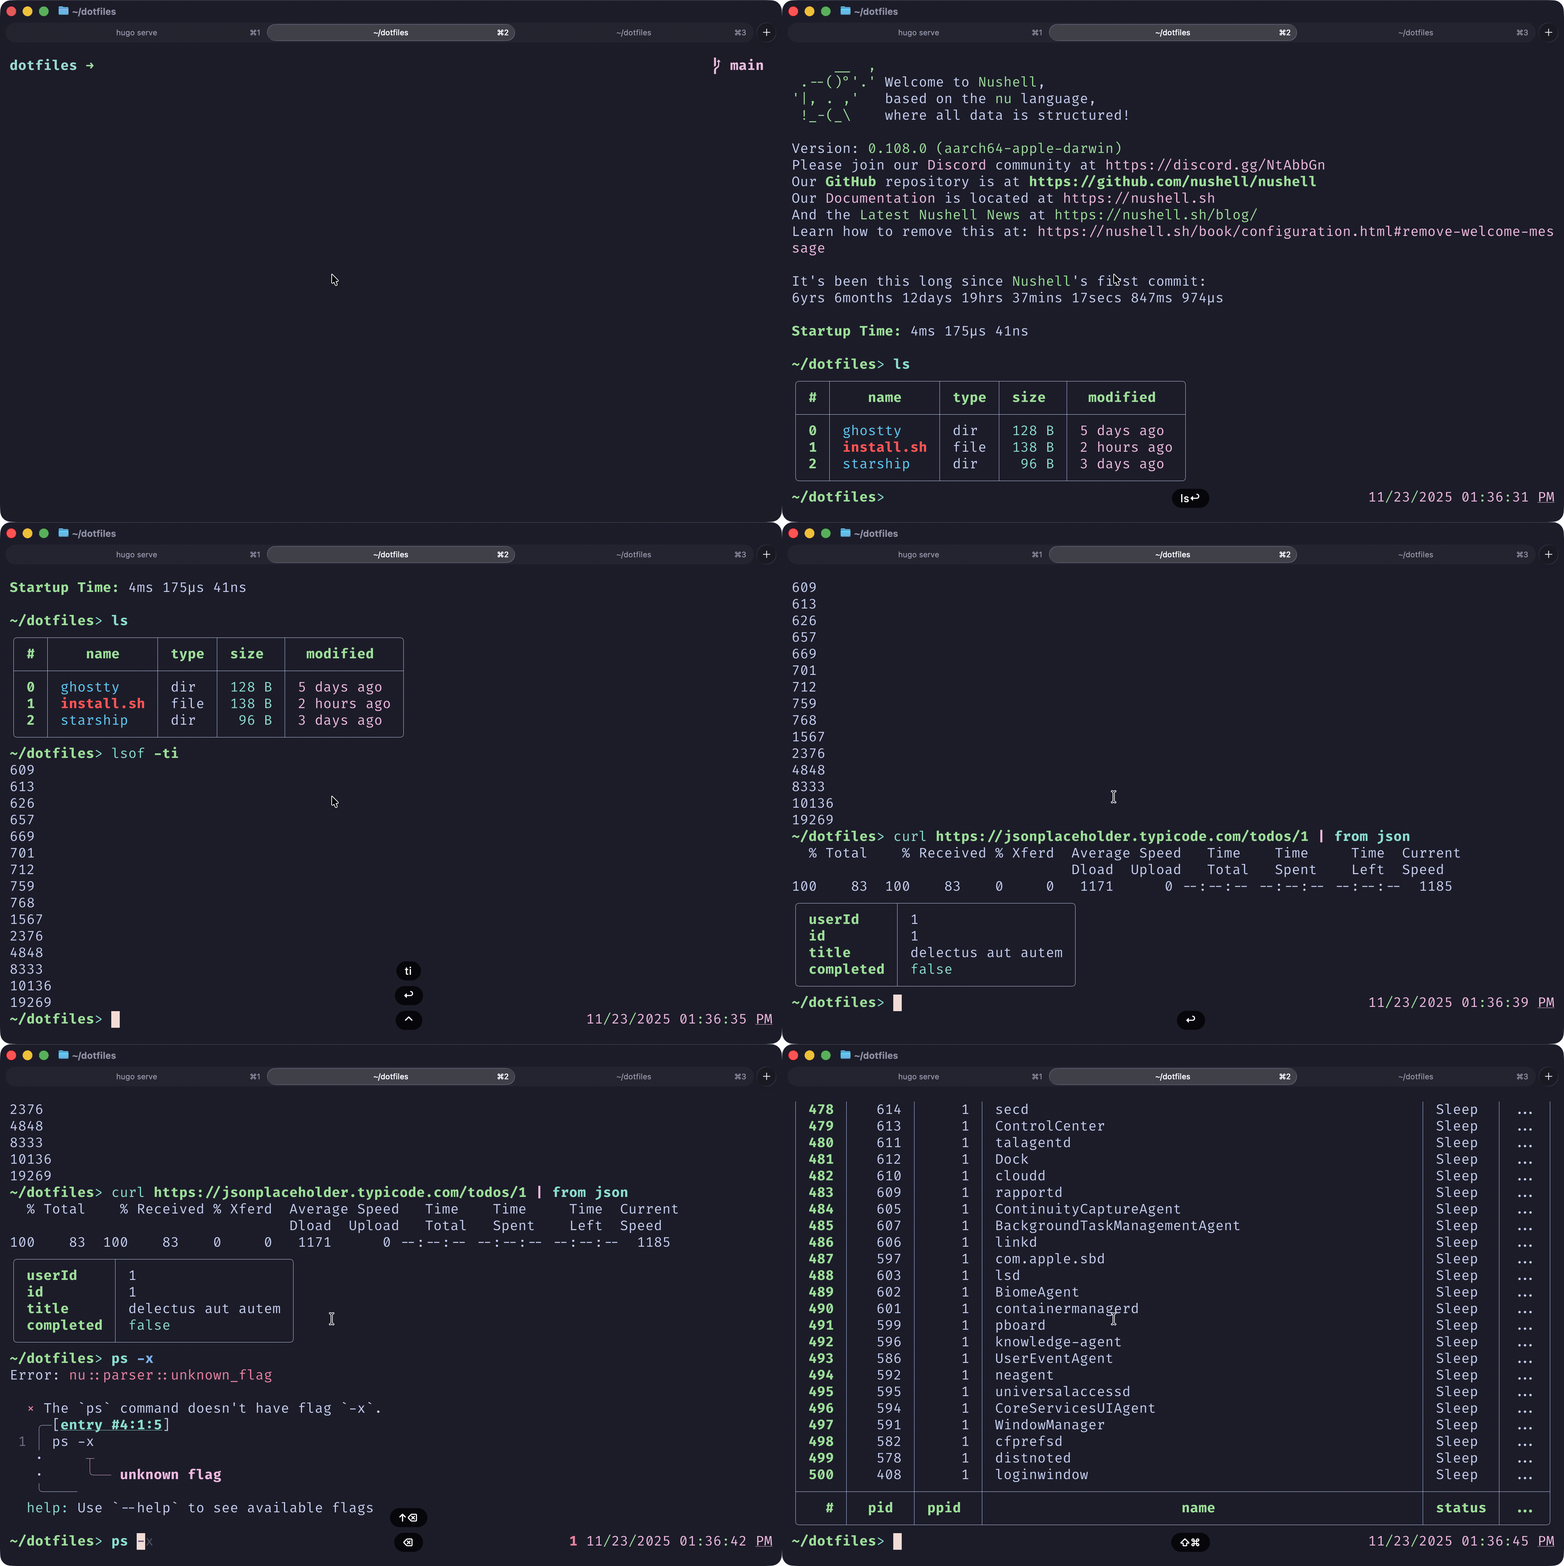 I'm not using it as my daily driver yet. Too much muscle memory in Zsh and nushell is not POSIX compatible. But it's genuinely impressive and worth experimenting with if you do a lot of data wrangling in the terminal.
```bash {filename="Terminal"} theme={null}
# Mac
brew install nushell
# Ubuntu/Debian
cargo install nu
# or download from GitHub releases
```
## NeoVim + LazyVim: When you need real editing power
I'm not using it as my daily driver yet. Too much muscle memory in Zsh and nushell is not POSIX compatible. But it's genuinely impressive and worth experimenting with if you do a lot of data wrangling in the terminal.
```bash {filename="Terminal"} theme={null}
# Mac
brew install nushell
# Ubuntu/Debian
cargo install nu
# or download from GitHub releases
```
## NeoVim + LazyVim: When you need real editing power
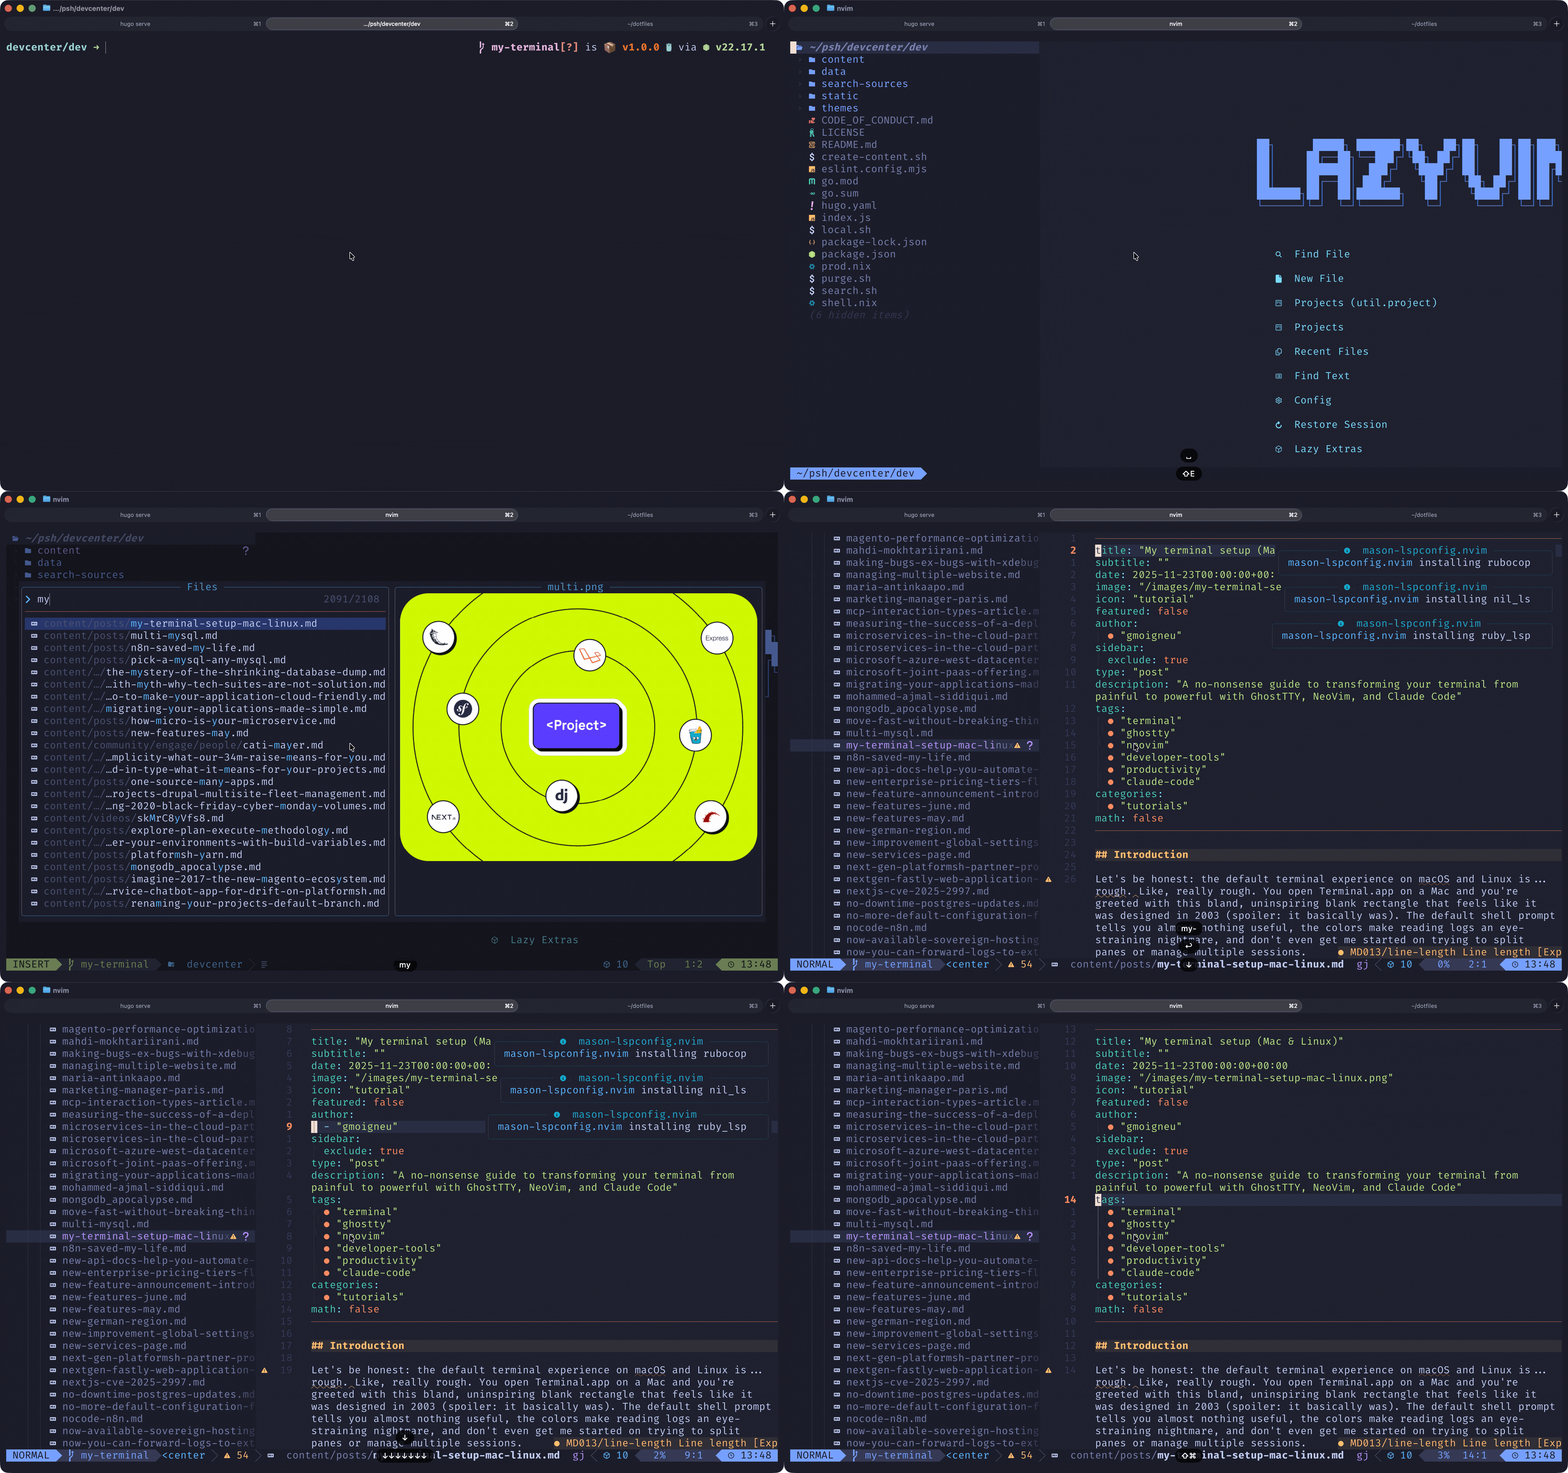 Let's be real: learning Vim is *hard*. The keybindings are completely alien if you've spent your life in GUI editors, and the learning curve is steep enough to make most people quit within the first hour.
I'm still on that journey myself. I regularly switch between VS Code forks like [Cursor](https://cursor.sh/) and [Anti Gravity](https://antigravity.google/) for my daily work while slowly building up Vim muscle memory. Some days I'm productive in NeoVim; other days I just need to get stuff done and reach for what I know. That's fine. It's a marathon, not a sprint.
That said, if you want to try NeoVim without spending weeks configuring it from scratch, [LazyVim](https://www.lazyvim.org/) is the answer. It's a pre-configured NeoVim setup that gives you a modern IDE experience out of the box: file explorer, fuzzy finding, LSP support, git integration, syntax highlighting. All the things you'd expect, ready to go.
```bash {filename="Terminal"} theme={null}
# Mac
brew install neovim
# Ubuntu/Debian
sudo apt install neovim
# Then install LazyVim (backs up your existing config)
git clone https://github.com/LazyVim/starter ~/.config/nvim
```
Launch `nvim` and let it install all the plugins. First startup takes a minute, but after that it's instant.
The best resource I've found for getting started is this video by Elijah Manor:
It walks you through the LazyVim setup and the essential keybindings you need to be productive. Bookmark it, you'll reference it often in your first few weeks.
A few tips for the learning phase:
* **Start with `:Tutor`** - NeoVim has a built-in tutorial. Run it. Actually do the exercises.
* **Use Vim keybindings in your regular editor first** - Both VS Code and JetBrains IDEs have excellent Vim plugins. Build muscle memory without sacrificing productivity.
* **Don't try to learn everything at once** - Master `hjkl` navigation, then `w/b/e` for word movement, then gradually add more.
* **Keep a cheat sheet handy** - You'll need it for months. That's normal.
The payoff is real, though. Once the keybindings become muscle memory, editing text in NeoVim feels like flying. And since it runs in your terminal, it fits perfectly into this whole setup.
## Claude Code: Your AI Programmer Buddy in the Terminal
Let's be real: learning Vim is *hard*. The keybindings are completely alien if you've spent your life in GUI editors, and the learning curve is steep enough to make most people quit within the first hour.
I'm still on that journey myself. I regularly switch between VS Code forks like [Cursor](https://cursor.sh/) and [Anti Gravity](https://antigravity.google/) for my daily work while slowly building up Vim muscle memory. Some days I'm productive in NeoVim; other days I just need to get stuff done and reach for what I know. That's fine. It's a marathon, not a sprint.
That said, if you want to try NeoVim without spending weeks configuring it from scratch, [LazyVim](https://www.lazyvim.org/) is the answer. It's a pre-configured NeoVim setup that gives you a modern IDE experience out of the box: file explorer, fuzzy finding, LSP support, git integration, syntax highlighting. All the things you'd expect, ready to go.
```bash {filename="Terminal"} theme={null}
# Mac
brew install neovim
# Ubuntu/Debian
sudo apt install neovim
# Then install LazyVim (backs up your existing config)
git clone https://github.com/LazyVim/starter ~/.config/nvim
```
Launch `nvim` and let it install all the plugins. First startup takes a minute, but after that it's instant.
The best resource I've found for getting started is this video by Elijah Manor:
It walks you through the LazyVim setup and the essential keybindings you need to be productive. Bookmark it, you'll reference it often in your first few weeks.
A few tips for the learning phase:
* **Start with `:Tutor`** - NeoVim has a built-in tutorial. Run it. Actually do the exercises.
* **Use Vim keybindings in your regular editor first** - Both VS Code and JetBrains IDEs have excellent Vim plugins. Build muscle memory without sacrificing productivity.
* **Don't try to learn everything at once** - Master `hjkl` navigation, then `w/b/e` for word movement, then gradually add more.
* **Keep a cheat sheet handy** - You'll need it for months. That's normal.
The payoff is real, though. Once the keybindings become muscle memory, editing text in NeoVim feels like flying. And since it runs in your terminal, it fits perfectly into this whole setup.
## Claude Code: Your AI Programmer Buddy in the Terminal
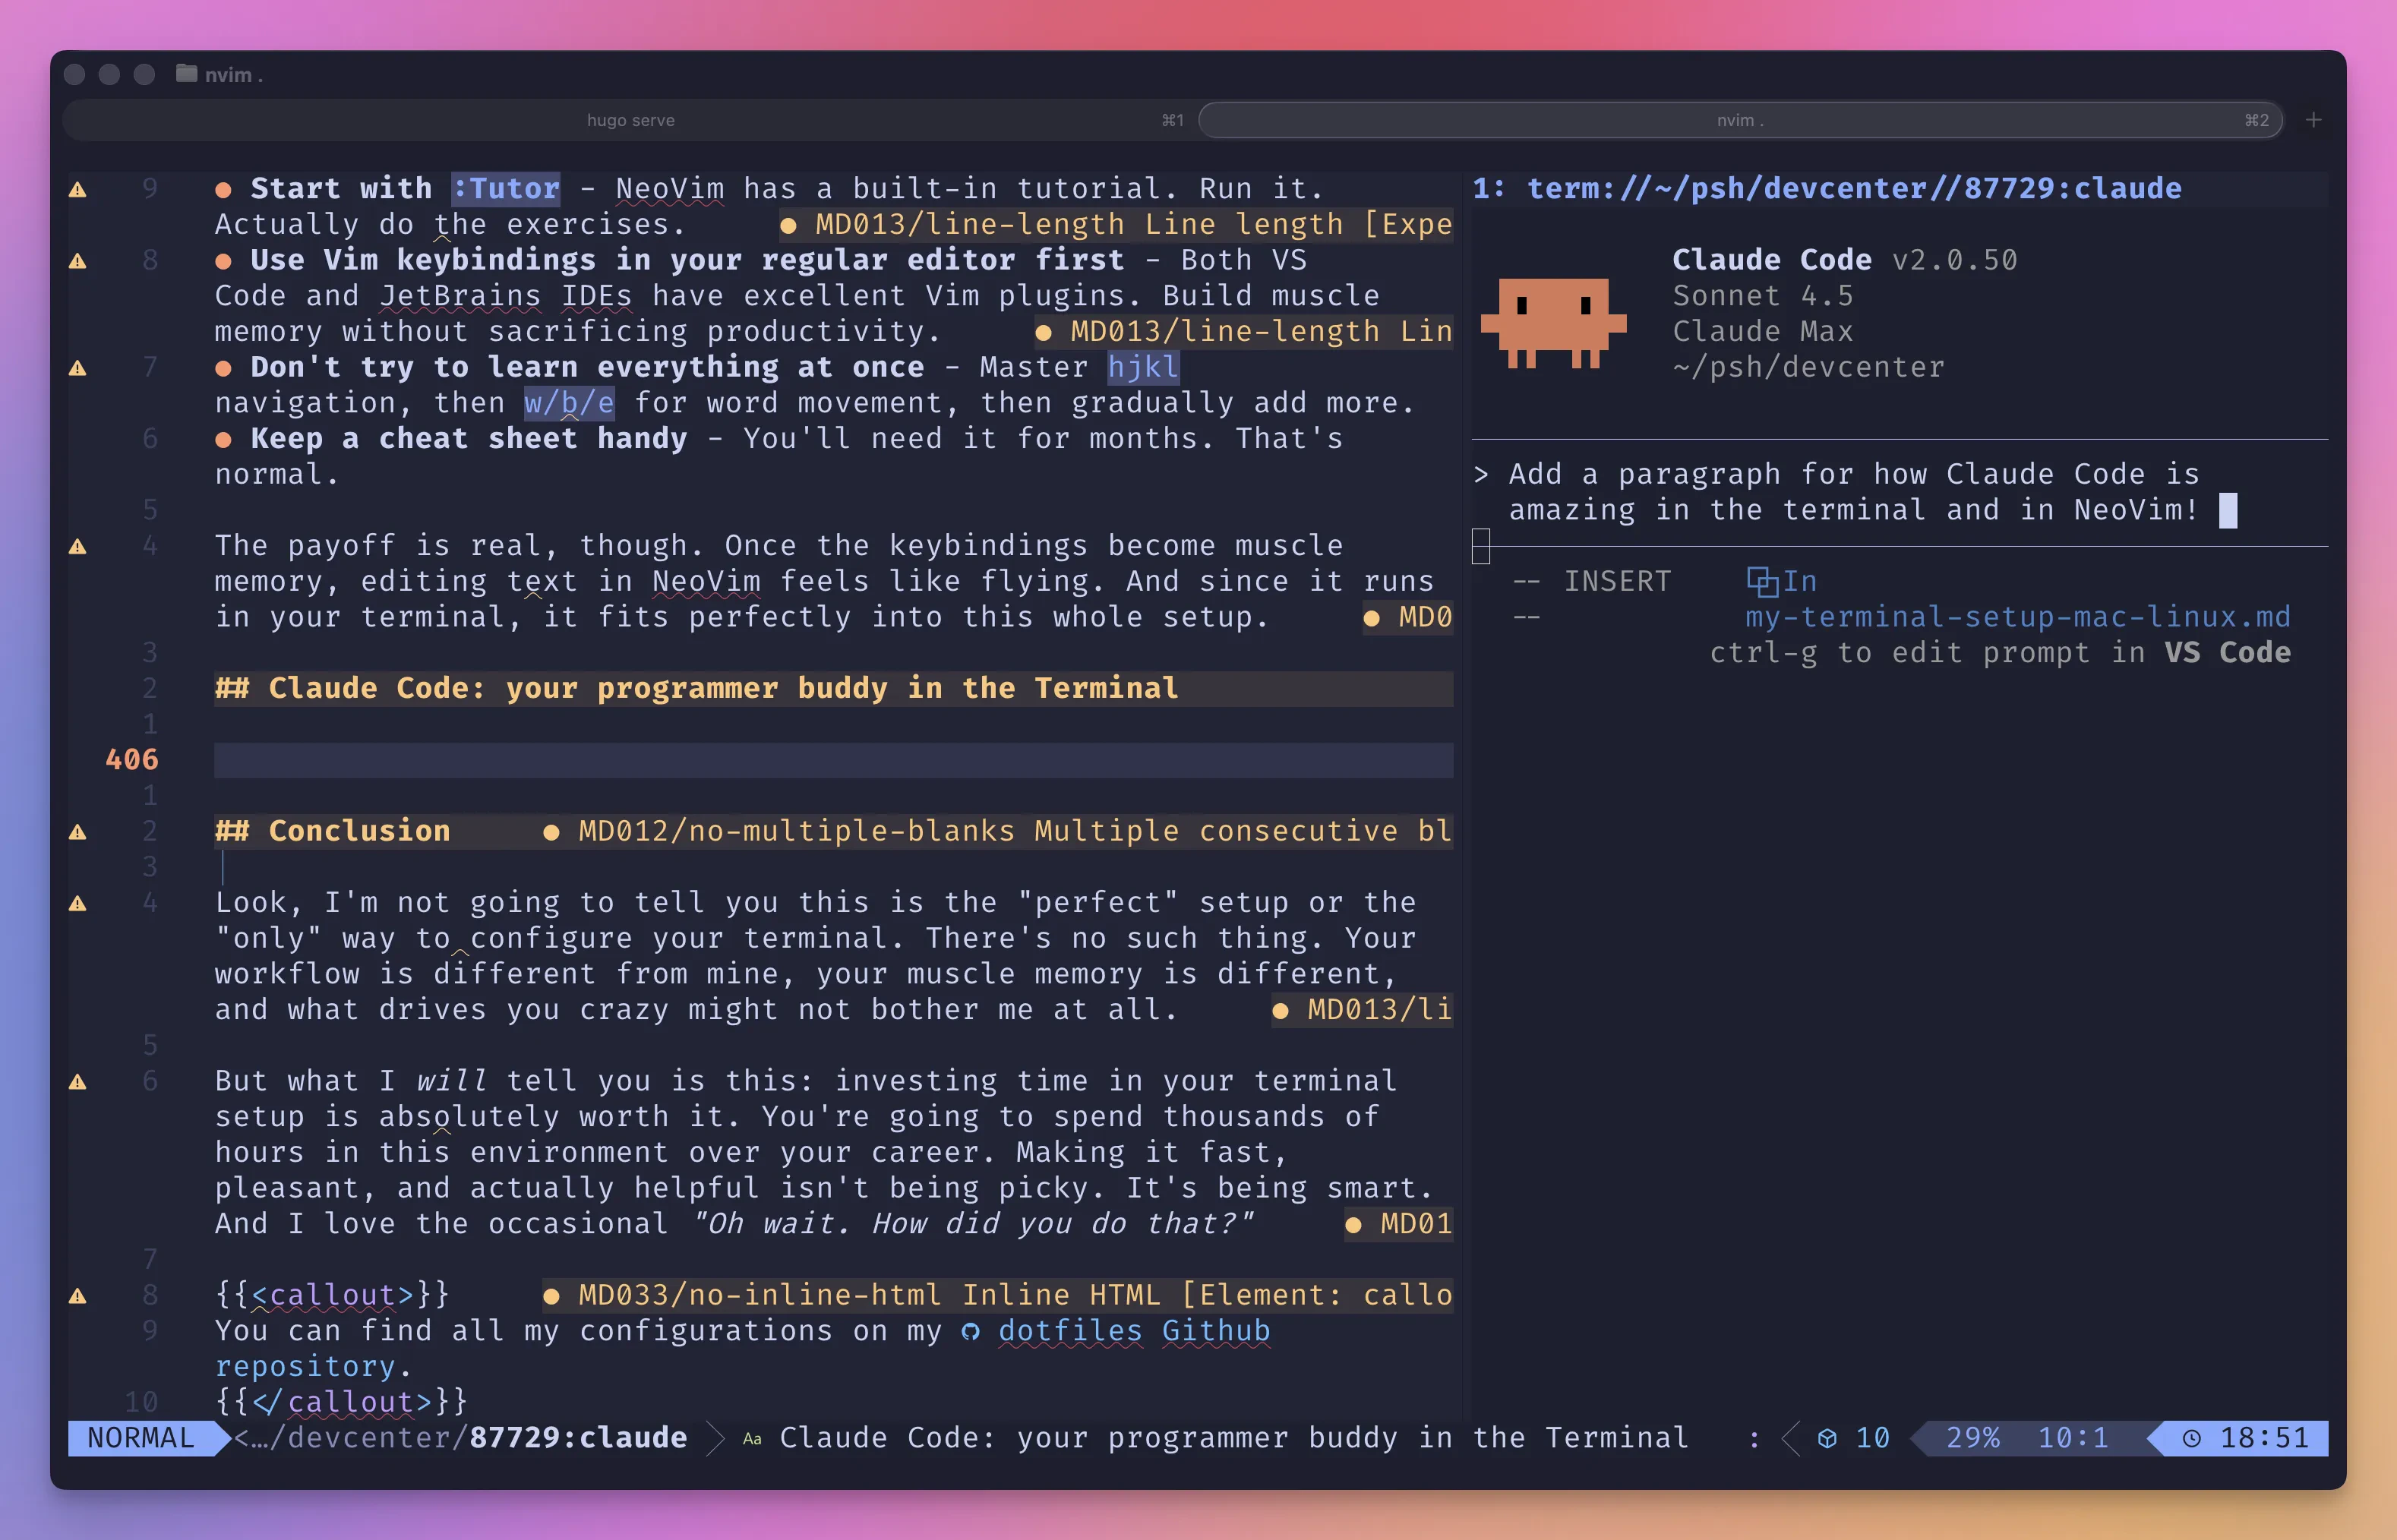 I'm sure you've heard about Claude Code at this point ... This is the AI assistant I have been using for a year now and without going into a lengthy debate on which one is the best, here is a quick run-through:
[Claude Code](https://docs.anthropic.com/en/docs/claude-code) works directly with your codebase: reading files, making edits, running commands, and creating commits. All from your terminal.
```bash {filename="Terminal"} theme={null}
# Mac
brew install claude-code
# Linux (via npm)
npm install -g @anthropic-ai/claude-code
```
Run `claude` in any project directory, authenticate, and you're good to go.
I'm sure you've heard about Claude Code at this point ... This is the AI assistant I have been using for a year now and without going into a lengthy debate on which one is the best, here is a quick run-through:
[Claude Code](https://docs.anthropic.com/en/docs/claude-code) works directly with your codebase: reading files, making edits, running commands, and creating commits. All from your terminal.
```bash {filename="Terminal"} theme={null}
# Mac
brew install claude-code
# Linux (via npm)
npm install -g @anthropic-ai/claude-code
```
Run `claude` in any project directory, authenticate, and you're good to go.